A new thing-a-majig and a new painting

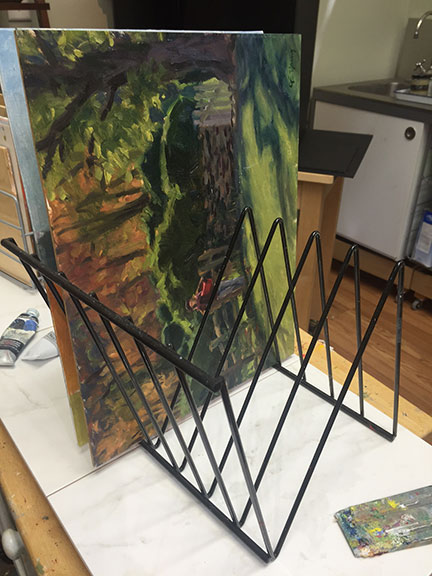
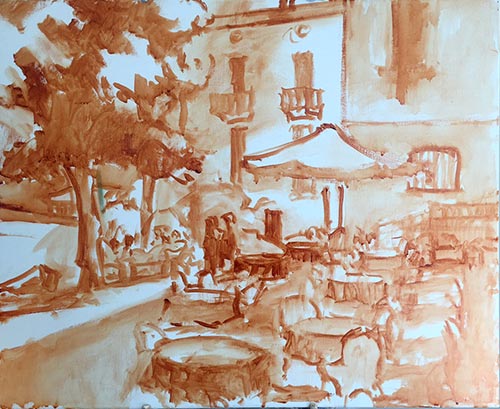
In the wake of the plein air weekend I wrote of in my last post, last week was mostly a recovery week for me. I did manage to get a new studio painting started, however. This is the initial tonal sketch on a 20x24" linen canvas.

Landscape painting tontal sketch by Jennifer E Young

This painting  may prove to be a challenge for me because much of this scene is in shadow. But there are a few pops of light that I am arranging in strategic places that I hope will carry the painting. Hey, you never know unless you try, right?

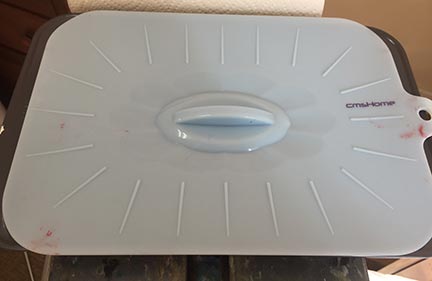
As with the other recent studio oils, I'm working with water miscible paints. One thing I'm noticing with these paints is that the paint blobs on my palette tend to gum up a little quicker once they are laid out, especially when I can't get back to the studio within a day. The manufacturer, Royal Talens recommends in their product info to mist the unused paints with a little water and cover  with foil to keep them moist and reduce the exposure to air. I have never liked putting plastic or foil directly on my paints though, because I feel that it wastes too much in the removal (yes I realize there is a bit of faulty logic in there but we all have our pet peeves).  So I'm experimenting with this:

What you are seeing is a basic 9x13" cake pan covered with a silicone doo-jobby that I found on Amazon. It is supposed to create an airtight seal, and the cake pan is deep enough that this cover-thing doesn't actually touch the paint. Whether it will be sufficient to keep the paint from oxidizing remains to be seen. I haven't been back at the easel since Saturday so I guess I will find out this morning when I go to work. I will report back with my findings, as well as an update on my progress with the painting, in an upcoming post.

Plein Air Crush

This week I am coming down off of an exciting weekend in Floyd County, Virginia, where I participated in the inaugural plein air event called Plein Air Crush. In total there were about 19 artists participating over the course of the weekend, with judging and awards taking place on Sunday. This year the event centered around Chateau Morrisette Winery, which has some interesting architectural features, lovely gardens and vineyards, not to mention a fine restaurant and some pretty tasty wine. It sounds luxurious doesn't it? But keep in mind I was not doing much sipping. Instead I was schlepping; schlepping a bunch of art gear and standing for hours, out in the elements. It was hard on the body but rewarding for the spirit, and I had a good time painting the new-to-me scenery and meeting other artists.

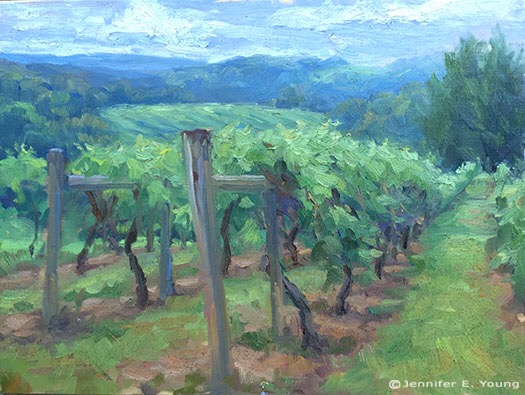
We converged on Friday evening for a little meet and greet, but the painting portion of the event kicked off on Saturday, where we faced the threat of rain and some pretty dark skies. Painting in these conditions is really challenging because the value range is very limited and the light fairly flat. So I decided to set up in the vineyard where I found opportunities for some strong linear elements and soft edges that provided interesting compositional options:

 Plein air vineyard landscape painting by Jennifer E Young "Vineyard in Gray Light", oil on panel, 9x12"

In the afternoon I decided to venture a little further afield to paint a view of Buffalo Mountain: Buffalo Mountain plein air landscape painting by Jennifer E Young "Buffalo Mountain View", oil on linen, 8x8"

Sunday was the quick draw. It was incredibly windy. Worse than clouds and rain, wind conditions are a nearly impossible situation for the plein air painter because of the danger of having your entire setup topple and/or take flight.  The wind at the winery required that most painters seek a shelterd place unless they had a good way of weighting their setup (which I didn't).

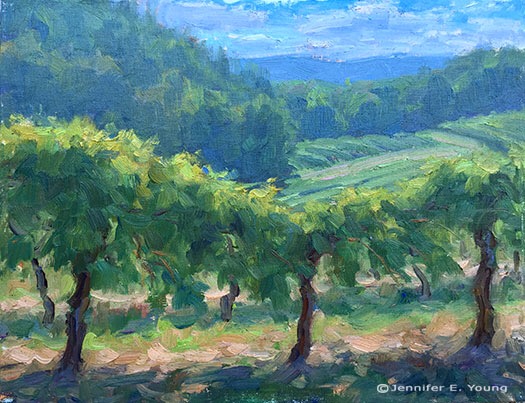
Down at the vineyard though it was much warmer and virtually windless. I hadn't really planned on doing another vineyard piece but I figured it was my best option for success when we had a time limit.

Plein Air landscape painting of Chateau Morrisette vineyard by Jennifer E Young "Sunlit Vines", oil on linen, 9x12"

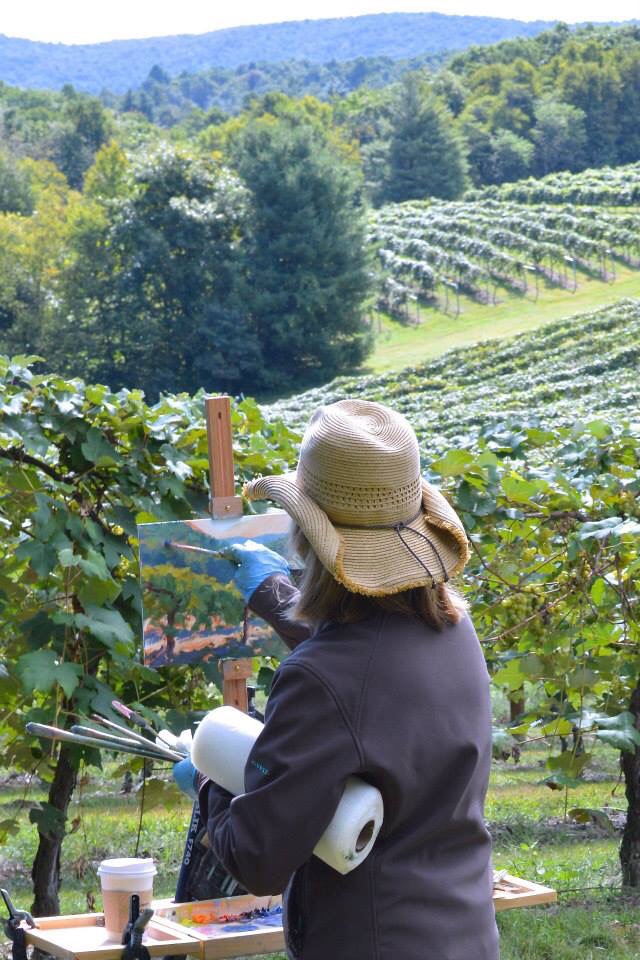
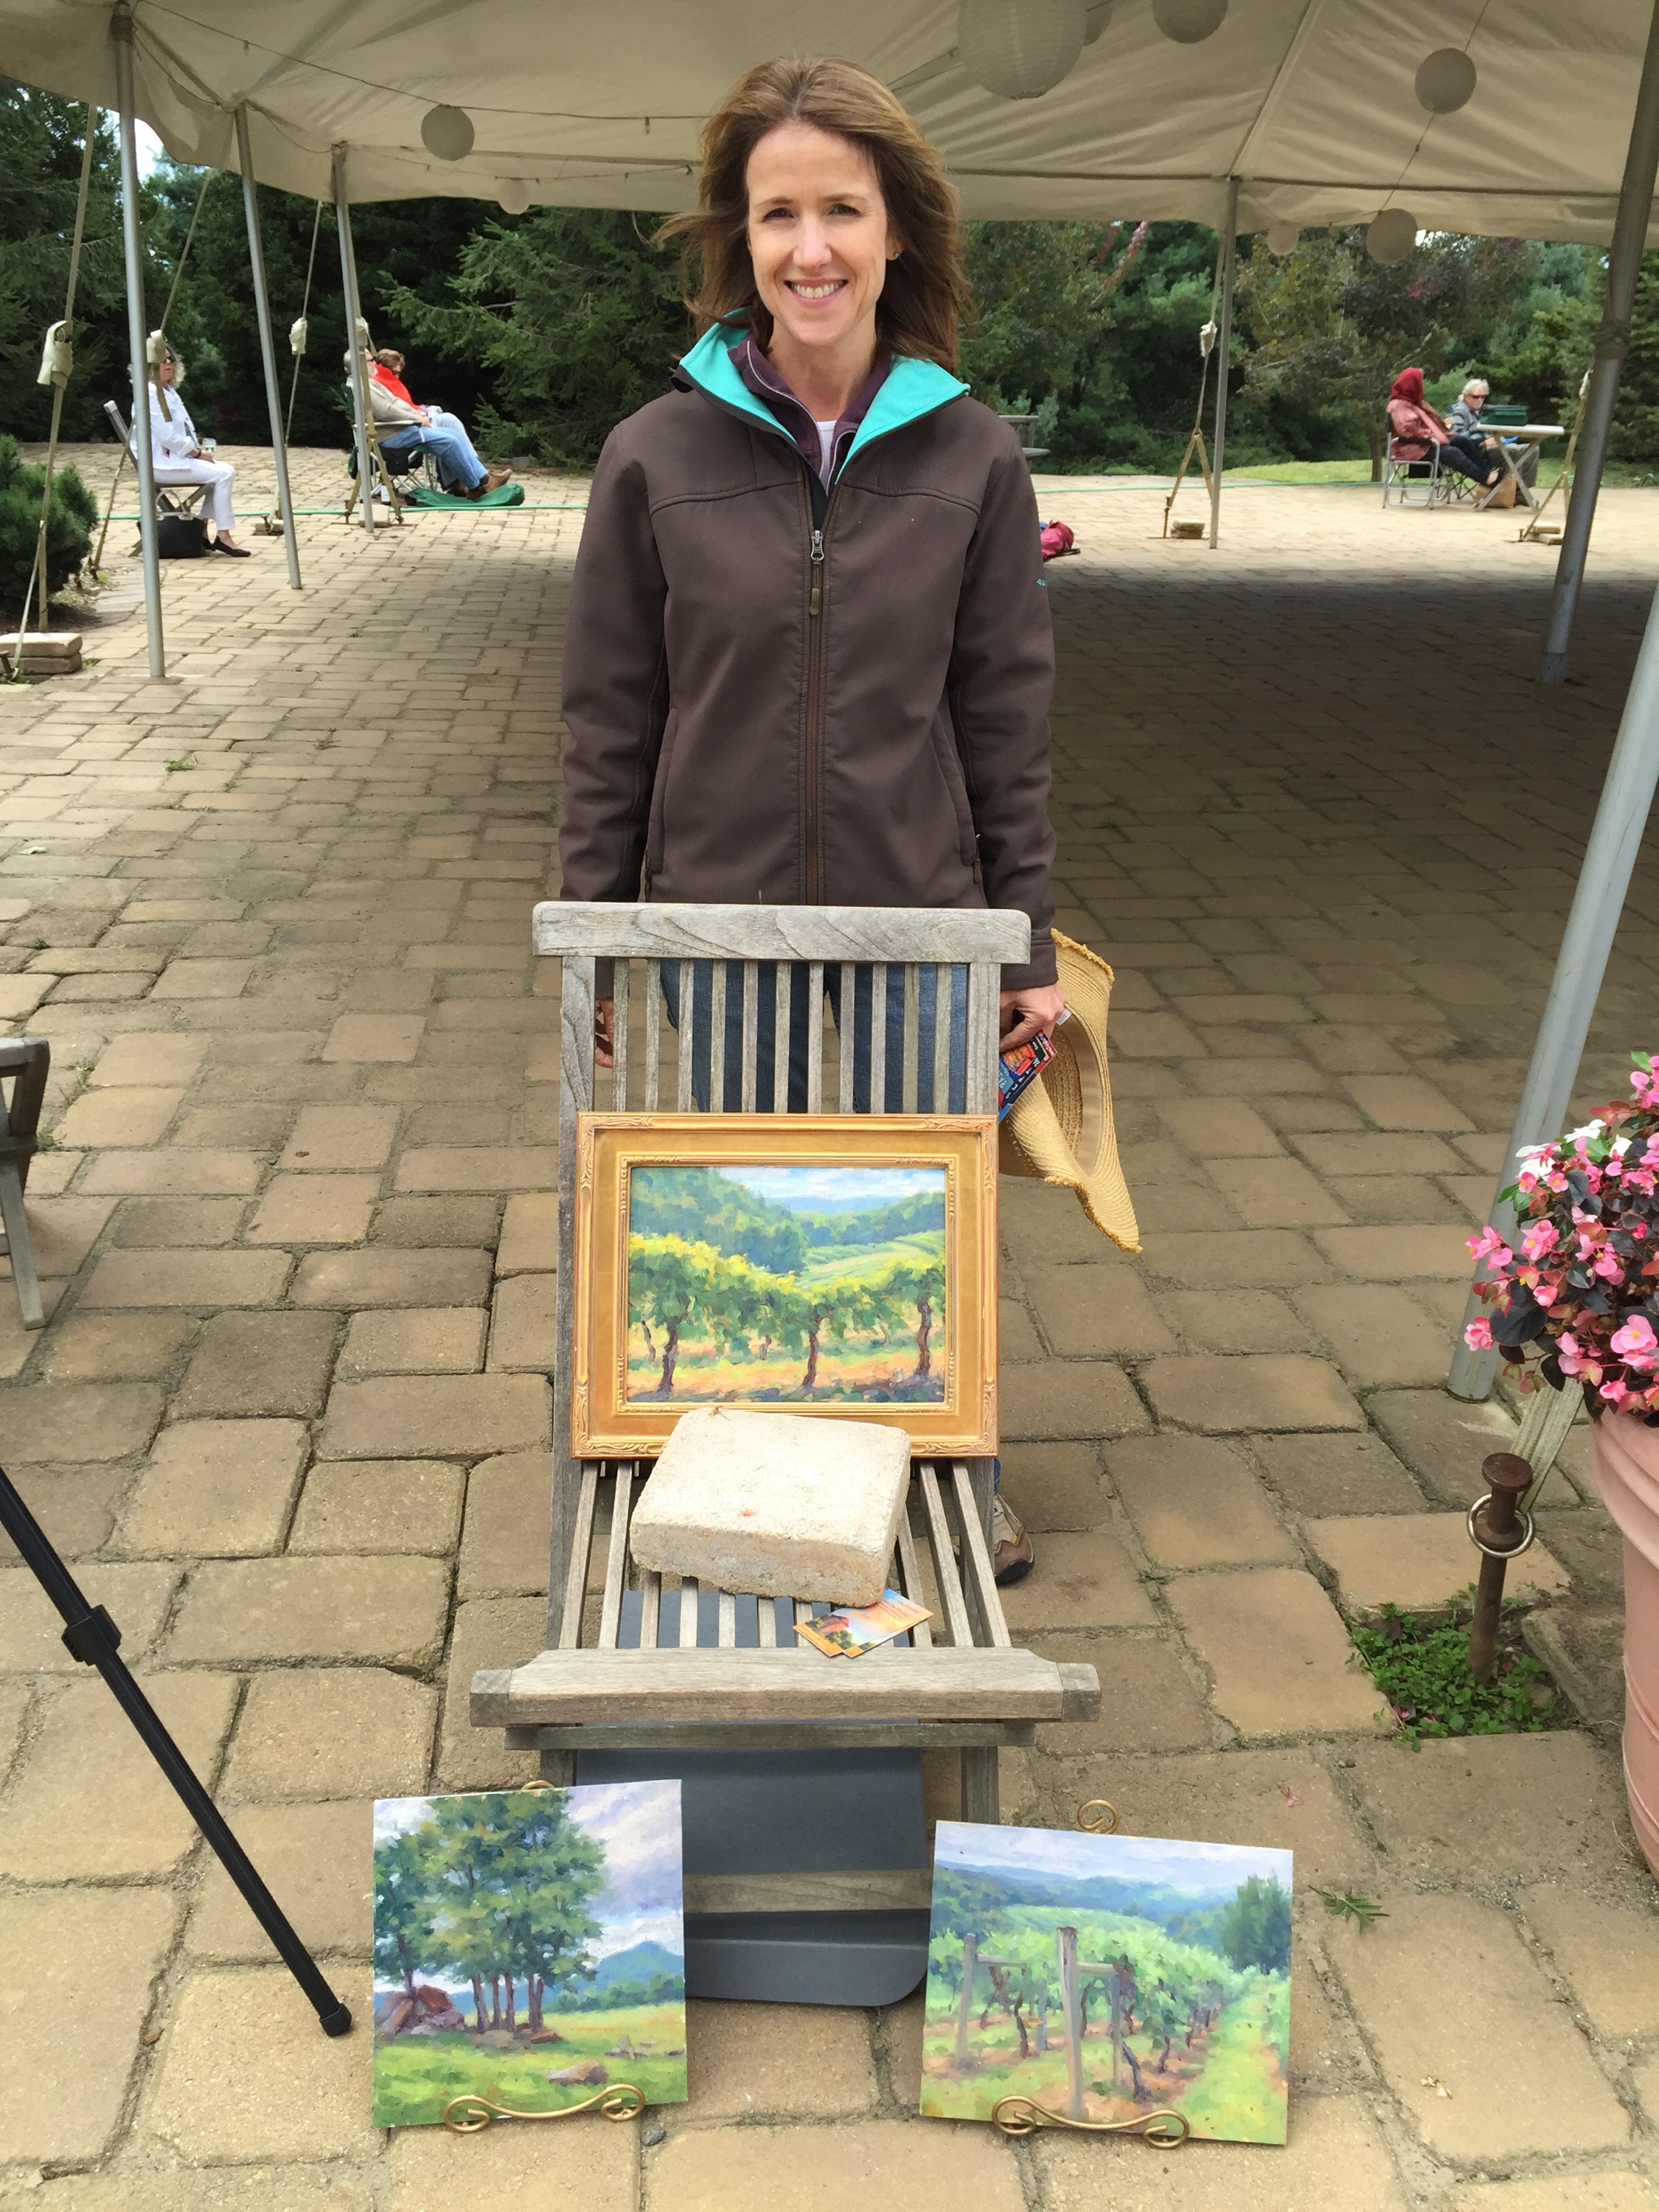
Plein air painter Jennifer E Young

We had three hours for the quick draw (which is actually pretty generous). At the alotted time we had to deliver our quick draw painting and the other works we had completed during the event and set up for judging. Steve Doherty, artist and editor of Plein Air Magazine was the judge. I didn't win any awards but it was cool to meet him and I learned a lot about my painting, and even a bit about myself as well.

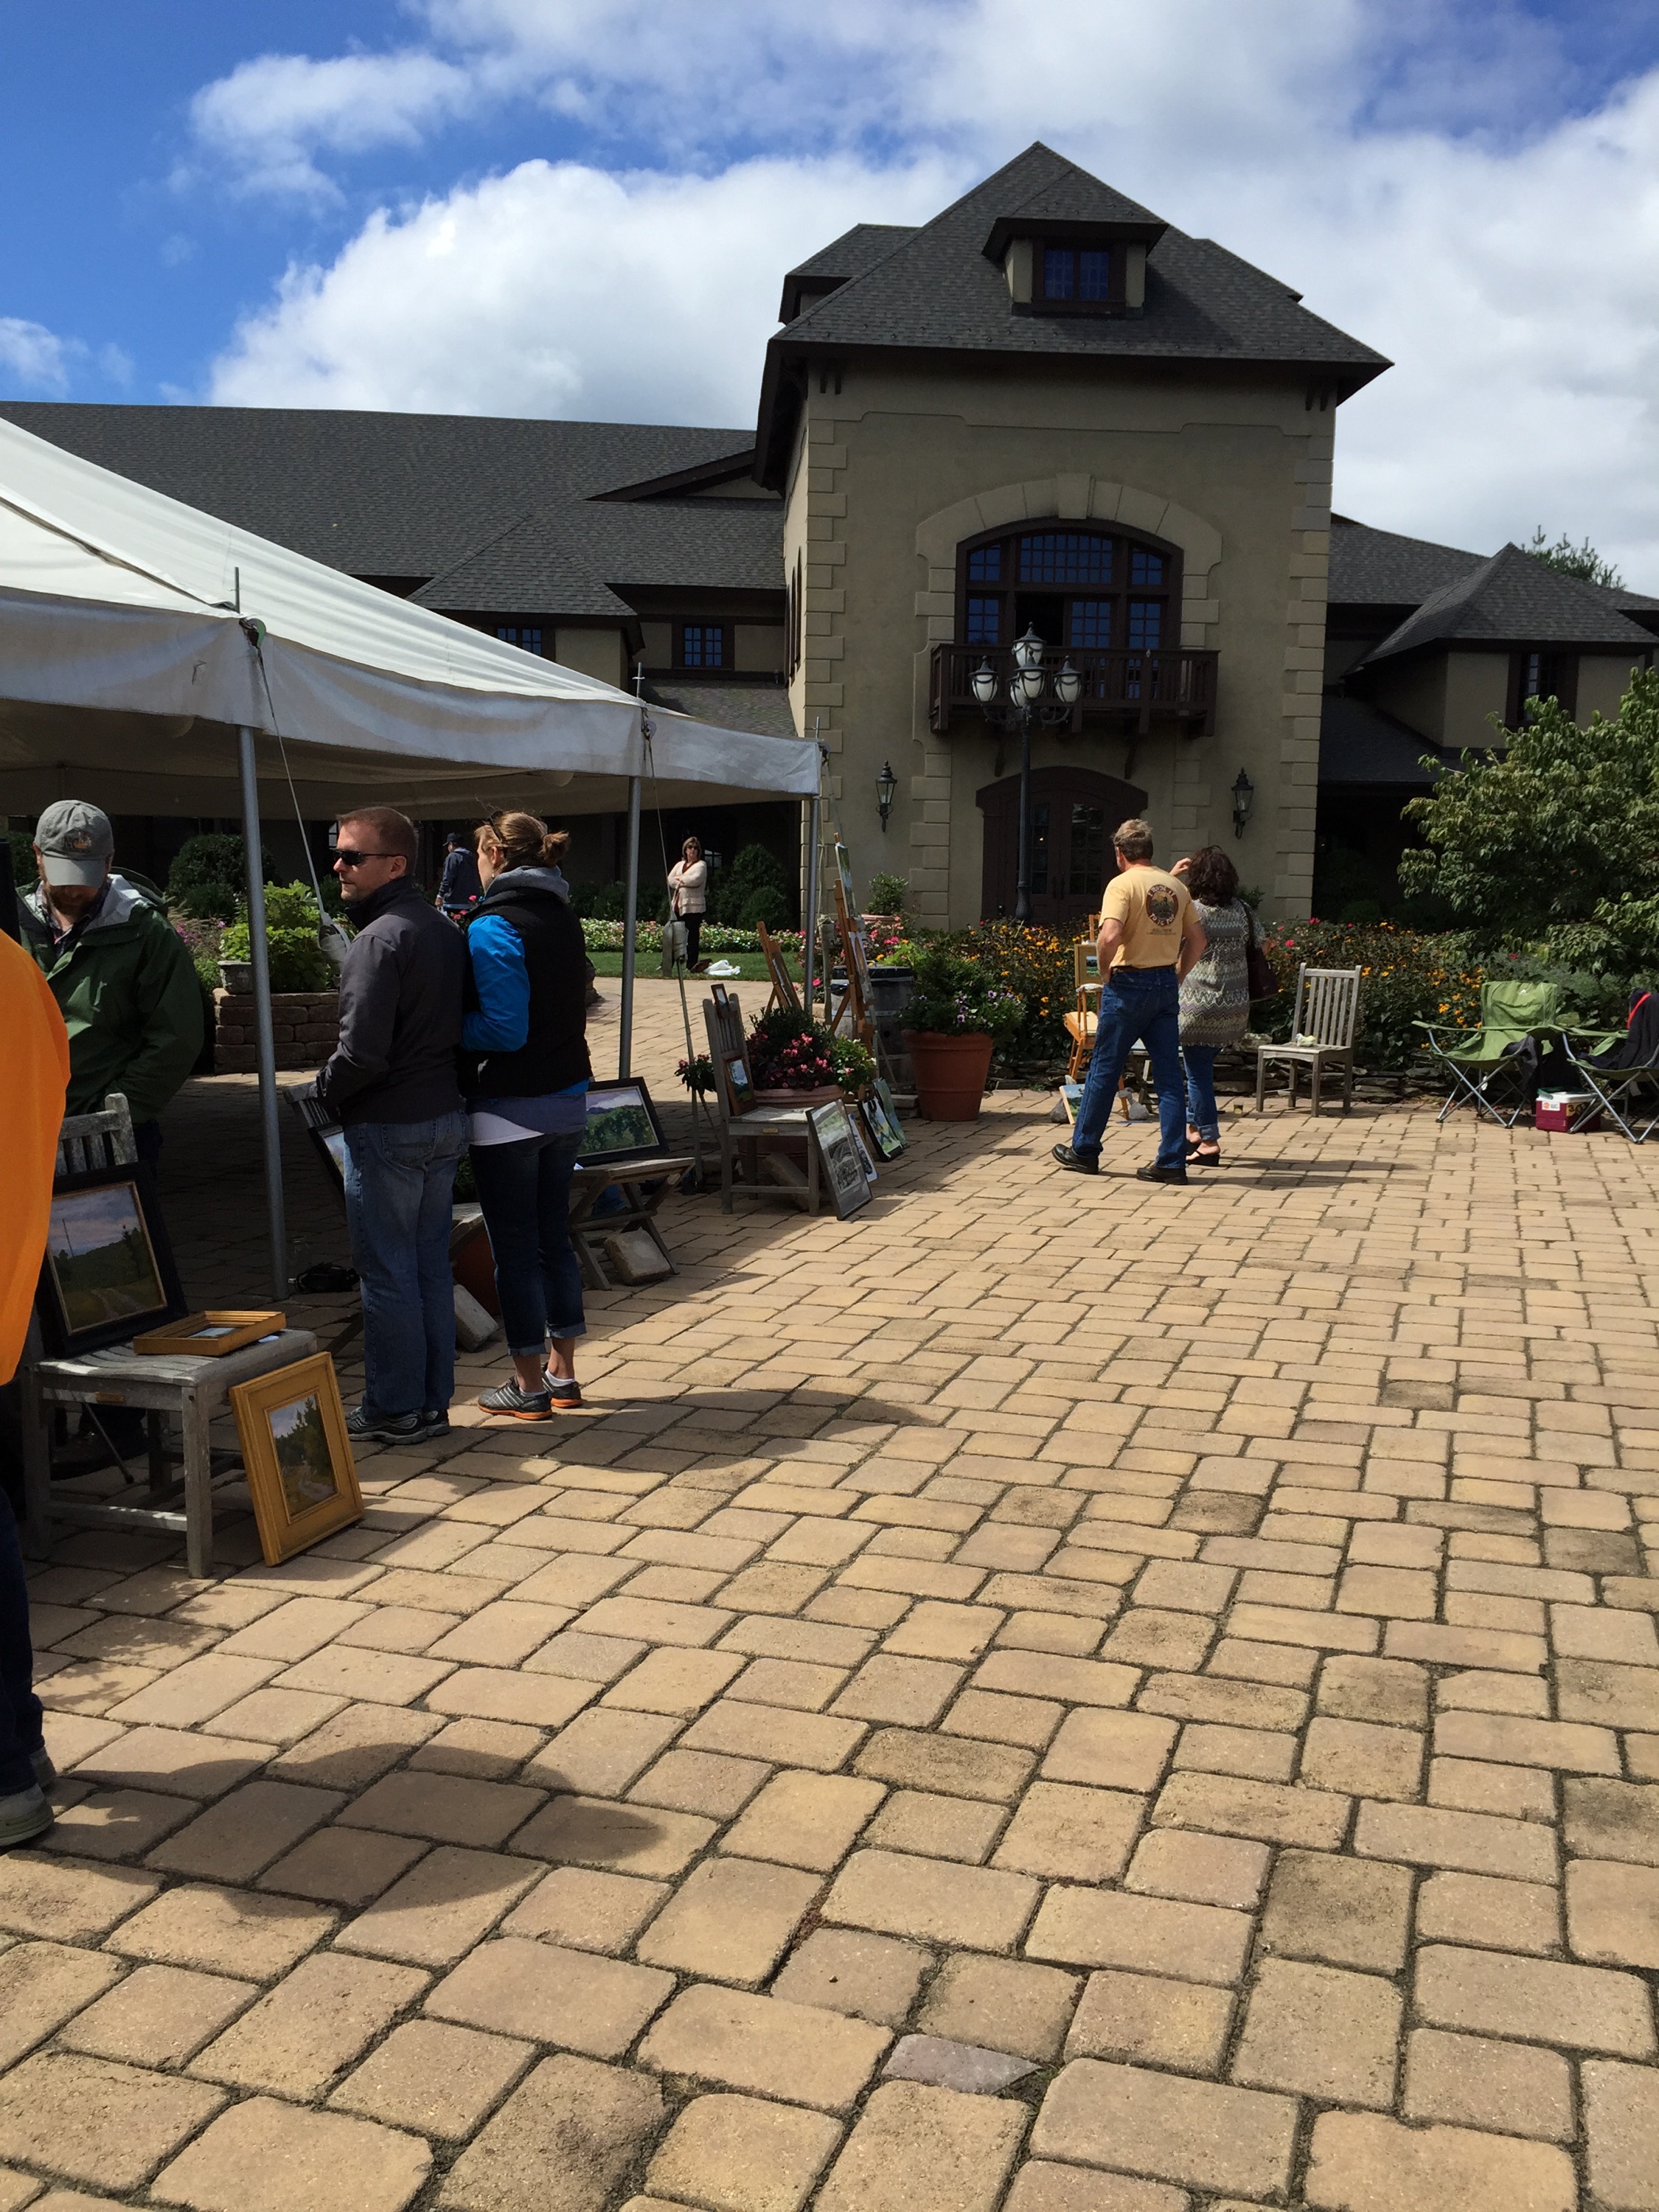
Setting up for the judgement back up at the winery

Here I am happy and tired. The wind blew up a bunch of dirt on my paintings. I have managed to get most of it off of the two vineyard pieces, but the Buffalo Mountain one was painted really thickly and I don't think that stuff is going to budge. Oh well...that's plein air for you! It was good winery soil at least.

I came home to a messy house and a bunch of dirty laundry, but it was a fair trade for having had time off from mommy duties to do my thing for a whole weekend. (Thanks honey!) :-)

Just Out Back

Yesterday after I sent my little one off to her new adventures as a kindergartener, I decided I'd better become acquainted with my new plein air box in advance of an upcoming painting trip I will be taking. Yes , play the funeral march. My Soltek finally died.  Actually, it's now a studio easel. I might be able to resuscitate it next time I have extra cash lying around to send it off for a "tune-up", but the legs seized up after my beach trips and no amount of squirting them out with a hose has made them functional again.

Enter the Coulter paint box. I had heard a lot of really good things about the design of this box and after much deliberating between it and several other really good boxes, I decided to pull the trigger and go for this one. So far I really like it. I need to paint with it a bit more before I feel qualified to review it, but I plan to at some future point when it has a bit more mileage.

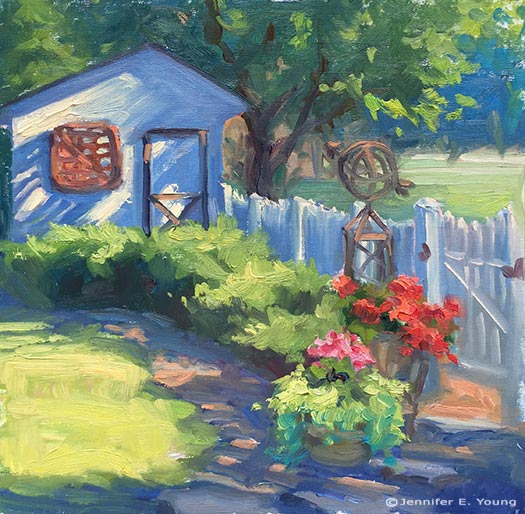
Given that I wasn't all that familiar with my new setup, I thought I'd take it easy on myself and paint a simple painting on our own property:

Plein air garden painting ©Jennifer E Young "Just Out Back" Oil on linen, 12x12" Click here for more info, or Contact me to purchase!

Turns out this was actually a complicated little composition, but I stuck with it and felt happy with the way it was resolved. Sometimes the challenge is to make something interesting out of where you are, instead of finding the exact perfect subject matter.  I liked the light on that little shed, and the shadows created by that crazy basket thing hanging on the side that was left here by the previous owners. And after all, when it comes to plein air painting, it's all about the light.

Summer by the Shore

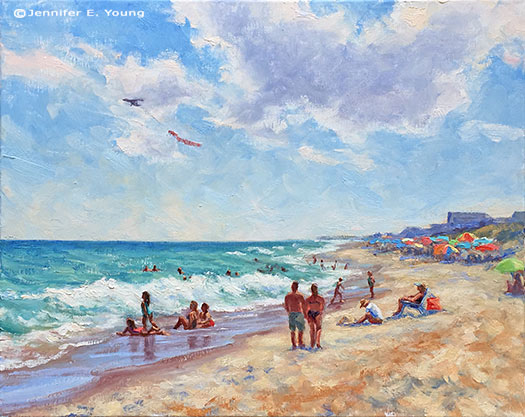
As much as I love the dramatic light of a sunrise or sunset at the beach,  full-on sunshine makes me conjure up lazy days and summer vacations. So as I sent my wee-one off the kindergarten today I guess I can admit that I have been feeling a little nostalgic (already!) for those long duty-free days filled with sandcastle building,  sun and sand between my toes:

Outer banks beach landscape painting ©Jennifer E Young "Summer by the Shore" Water Miscible Oils on Linen, 16x20" To purchase, contact me!

I had such a fun time with this one. It was almost a way of teleporting myself back to the beach. I especially enjoyed painting the figures. Here is a detail  of some of them:

summershore_detail

In fact, I had so much fun that I may even do another painting with just these two girls frolicking in the waves.

As I mentioned in my prior post, I am loving painting in the studio with water miscible oils. I will still work with traditional oils outdoors, mainly because I have quite a large supply of them in my stock. But gradually, in spite of some early struggles, I feel I am getting the hang of painting with the WS variety. I am loving that they are solvent and odor free, and have managed to work with them in a way that creates a lovely rich texture. This is helped greatly by my new Rosemary & Co. brushes, I might add. If you paint, do yourself a favor and check these out!

One of my struggles early on was that the water soluble oils weren't playing too well with my natural bristle brushes. Even after I realized that I shouldn't thin with water and wipe the water out of  my brushes thoroughly  between washing, my bristle brushes would get fairly flabby after a while. I really dislike synthetic brushes because they lack the spring and paint load abilities of a natural hair. Enter Ivory and Eclipse brushes by Rosemary & Co. These are synthetic brushes, but they behave much more like natural hair bristle brushes. Amazing! They really hold the paint and have just the right amount of spring in them. And the prices are quite reasonable as well. If I were to pick just one type ( though why would I want to do that?!) I'd go for the Ivory because they are more like the bristle brushes I normally paint with for my direct painting method. But the Eclipse, which are touted as a "synthetic mongoose" are really nice as well for finer details and soft edges. I really look forward to trying out some of the other styles as time and money allows. Meanwhile, I think I'll head back to the beach soon (by way of the easel!)

Sunrise Stroll

Back in spring as I was packing up and/or discarding my earthly belongings, I had imagined that by fall we would have begun working on a new studio at the new house. "Oh, I'll be up and running by winter," I thought. Well, I may have been a "tad" optimistic as we haven't come close to deciding how or even where we will fashion one.  In light of the constant waffling, we finally decided to rent a little temporary workspace for me, to take the pressure off a bit.

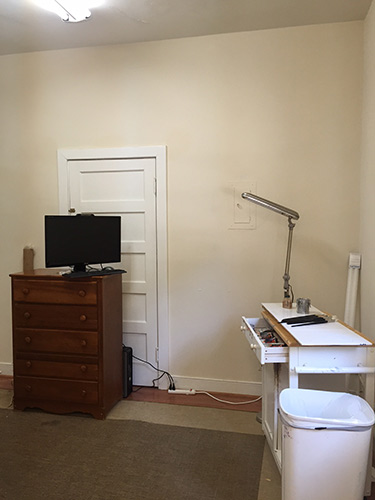
Viola! My little space. It's certainly a far cry from my former studio. It's tiny, it's dark, it's plain...but it's mine (at least temporarily). And I couldn't be happier to be back at work. :-)

space

What's missing in this picture is, of course, the easel. I will keep things simple (and light) by using my Soltek in here. I have also added a few additional lights to brighten things up a bit and make things a bit easier on the eyes.

To kick off the occasion, I dove into a subject I have been dying to develop since I painted it on location this summer- The Outer Banks of North Carolina. I was especially keen to dive into the concept of the sunrise, having tackled in en plein air in July:

Outer Banks landscape painting ©Jennifer E Young "Sunrise Stroll" Oil on Linen, 20x24" Contact me to purchase!

 Because I am renting this space and the ventilation is poor, I will only use water miscible oils here. So this, friends, marks another inaugural moment, of sorts--my first studio painting with Royal Talens Cobra water miscible paints.  I have to say, I am loving these paints in the studio. They stay open longer than my traditional oils, which makes it easier to manipulate edges  and build up to lovely, lush texture without having to do it all alla prima.  The only criticism I have at the moment is that the Titanium White in this brand is rather weak. Maybe I just need to get used to the tinting properties of the other paint colors,  but I used  almost half of a 150 ML tube of paint on this one 20x24" painting. (And that's not *much* of an exaggeration.)  Otherwise, though, I am having a great time and am so happy to have a room to call my own to create and leave all of my toys lying about.

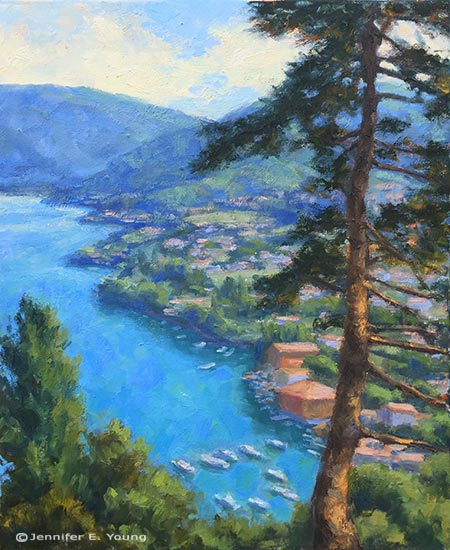
Bellagio From Above--Redux

The painting below was completed a while ago and has been sitting in my office since the move to our new home. So  I have had a lot of  opportunity to look at it lately with new eyes:

arielbellagio

 While I liked the painting before, I felt it could be improved and opened up a bit more to give this view a little more breathing room. So I looked back through my image archives from my trip to the Italian lakes and found several different views from this approximate vantage point. I then followed my own guidance and decided to play around with the composition in Photoshop to see "what would happen if..." I really wanted to capture more of the beauty of the lush blues in the lake and the mountains beyond:

bellagiofromabove "Bellagio From Above" Oil on Linen, 20x16" Click here for more info!

Of course, one change lead to another and my minor edits became quite a re-working. I oiled out the areas I wanted to repaint, and then set to task. This doesn't always work for me, as sometimes the paint layers have too much " skin' or texture, but this time around I guess the paint was more evenly applied.  I really like the way this turned out! It is much more aligned with the concept I had from the start- only now a little better executed.

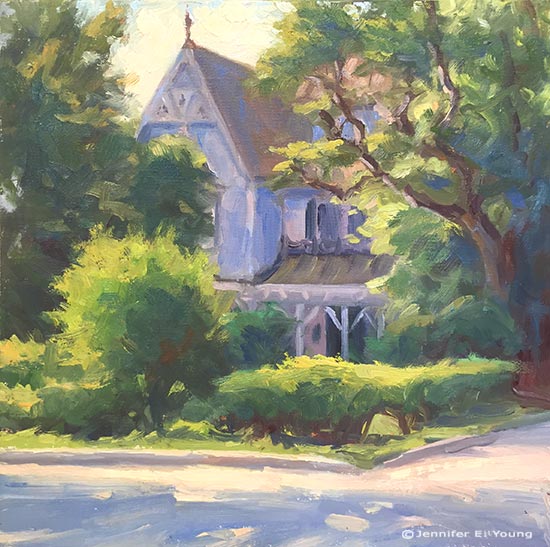
A Splash of Light on Howard Street

Aside from painting on my back patio, I really haven't done much plein air painting in my new town. Now that the heat seems to be letting up, I am aiming to change that. Here's a start. I see this scene during my morning walk/runs and have admired the fall of light as it spills across the shrubbery, taking center stage as the old Victorian sits austerely in the background.

plein air painting Ashland, VA ©Jennifer E Young

"A Splash of Light on Howard Street" Oil on linen, 10x10" Contact me for more info!

Commissions, part III; wrapping it up!

In my last two posts, I took you through the proposal process of one of my recent commissions. If you wish to read this series from the beginning, start with Part I, followed by Part II. Today I'd like to share with you how the commissioned paintings turned out. I also have a few thoughts on commissions in general; both what to expect if you are a collector, and how to consider going about them, if you are an artist.

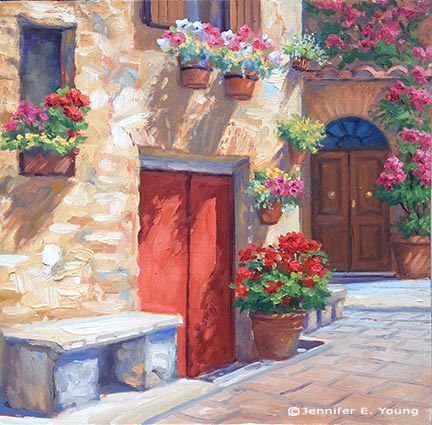
After having submitted my proposals for both of the paintings, I have now received the go-ahead to proceed. Here are the two completed paintings:
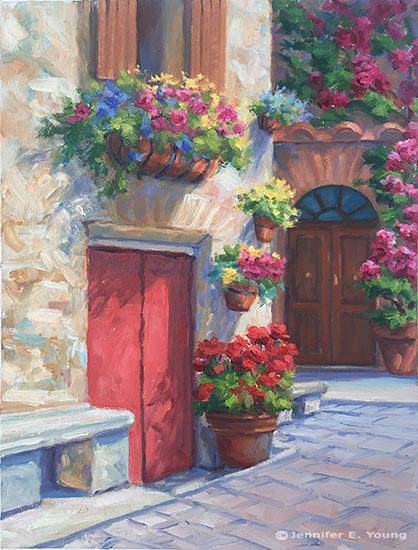
Italian village painting by Jennifer E Young

"The Potted Garden II", Oil on linen, 16x12"
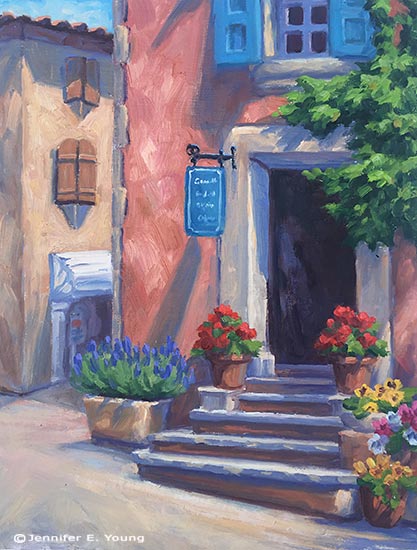
"The Corner Shop, Roussillon" by Jennifer E Young, All rights reserved "The Corner Shop, Roussillon", Oil on Linen, 16x12"

I'm very glad to say that the client expressed great satisfaction with the two paintings and they are now framed and in their new home.

Commissions are great experiences for artists because they push us to think about our art from a new perspective. Yes, as artists we all want our work to stand on its own. At the same time, nothing exists in a vacuum, and I am ok (and in fact, really flattered) with the knowledge that my paintings will coexist with other art in a collection, as well as other family heirlooms that will be important and valued by a family, possibly for generations.  So it's a great honor to even be asked about commission work and I am always happy to discuss that possibility and to converse in-depth about not only the art but the environment where the art is intended to be placed. With this in mind, here are a few things to note that make commissioned work a special animal, worthy (apparently) of three blog posts!

1) The Conversation

The conversation ( usually more than one) is probably the single most important element of any commission. This is the artist's opportunity to gather all of the relevant information about size, environment, and (very important) color preferences. Color, in fact, is the one topic that comes up rather emphatically in nearly every conversation I have with prospective commission clients. It's understandable, as color elicits so many varying emotions.

Ideally these conversations would be done face-to-face, but that is usually either not possible or practical. Most of my commissions have actually been negotiated, in fact, via email and phone. In these cases, Photoshop is definitely my friend!

2) The Proposal:

This is where I do my best to incorporate the ideas and desires of the client into a work of art. Sometimes, as in the examples I've provided in these last couple of posts, I have studies or compositions already worked out. In these cases, I just use my old buddy Photoshop.  More often, though, I am creating something from scratch. In these cases I will submit a  sketch with color notes, as well as a few of my photo references that I will use to incorporate some elements into the composition. The more visual examples given at this stage, the better.

3) The Approval:

The next step is to await the feedback of the client, or, if things go really smoothly, await the client's approval to proceed.

3) The Deposit:

This topic is often one that people don't like to talk about, but it's an essential part of many artists' working methods, so I am going to throw this horse right on out there on the middle of the dining room table. As artists, we need to decide for ourselves our best practices so that we feel good about the work we are doing.

Earlier in my career, I did not ask for a deposit for most of my commissions. As long as I felt like I was able to sell the work in a gallery if needed and that it didn't stray too far from the rest of my body of work,  I felt okay about working on speculation. Times change though and though the vast majority of my experiences were excellent, an odd one or two "hiccups", as well as certain life experiences (like having a child)  helped to shape my perspective on the boundaries I should set for myself and my work.

Nowadays, with few exceptions I require a deposit to proceed. This would occur once my proposal has been approved by the client.  The amount is either 1/2 down, or, if it is a very large and involved commission, 1/3 down, 1/3 at approval half-way, and 1/3 prior to delivery. Most collectors are okay with this arrangement and understand the whole working -for-compensation thing. I also think they appreciate that that it is to everyone's advantage that there is a commitment made to secure the agreement.

A deposit doesn't just cover an artist's materials, by the way. It also covers her time. Keep in mind that a proposal already commands a good deal of time and effort to prepare. Time is the most precious commodity I have. It is up to each individual to determine how they wish to work and what they want to spend their time working on.

4) Art Direction

Some artists are more ok with art direction than others. Having had a taste of the heavy-handed variety, I can most definitely state that I am not in favor. ;-) This is not to say that I am adverse to hearing client's preferences and feedback!  This is the whole point of "The Conversation", and I do welcome it if a minor adjustment is desired. However, I can't start over with a new concept, (which would mean a new painting) make profuse alterations, or do anything that I feel would greatly compromise the integrity of the painting.

Most clients understand, and I do my best to clarify in advance,  that any painting I make is going to be unique,  not  a copy--either of my own work or anyone else's . Beyond preference in color and subject, a collector commissions an artist because the artist has his or her own voice, and it's up to the artist, ultimately, to determine the best expression of their idea. In other words....Nobody puts Baby in a corner!

All joking aside, most people are really very happy to let the artist do her thing.  In fact, "that thing she does" is the whole reason the client was attracted to her work to begin with. Nevertheless, it's good policy, and indeed it's the artist's responsibility to clarify all of that with the client so that expectations are managed. Of course, every commission is unique and there are definitely nuances that  can vary my approach to a certain degree. The key is to keep communication lines open and to be open to honest feedback.

This just about wraps up my commission process, or at least the highlights. If there is anything I have missed, or if you have any questions, please feel free to leave your thoughts in the comments. If you are an artist, feel free to share how you handle your own commissions. I would most especially  welcome the thoughts of collectors (or potential collectors) also. Have you ever commissioned an artist? What was your experience? Let me hear from you!
Commissions part II

This post is a continuation of a prior post I've written on my commission process. If you missed it you can find that post here. Having secured the final approval for the first commission I wrote about yesterday, I needed to do it again for the second painting.  During my image archives search for a complementary composition I came across this 20x16" painting, done some years ago from my own photo references and sketches done on site. I felt this composition was similar enough in feel to relate to the first painting, and yet different enough to add some visual interest:

French village painting © Jennifer E Young

Because I wanted the  two little commissioned paintings to "talk to each other", I reversed the above painting, and scaled the image to 16x12". Like the first painting, this one also scaled really nicely to the new format:

French village painting of Roussillon by Jennifer E Young

Using my photo-shopped mock-ups, I provided a this shot below to show how the two paintings would look side by side:

Vibrant paintings of French and Italian villages by Jennifer E Young

There were a few color notes to keep in mind. The client wanted these to pieces to go in a room with an open floor plan where other artwork was already present. There was one painting in particular, a large pastoral with a red barn, that I needed to be cognizant of when creating my pieces. I didn't need to "match" the red, but I needed to be aware of it so as not to clash. This painting had a mid-to-cool temperature red focal area, so I'd steer away from anything too orangey. There were also some lovely aubergine and turquoise accents  in the shadows of the large painting that I noted and would attempt to riff off of in the paintings I was about to create.

My collector gave a big thumbs up to the ideas I had proposed. Whew! Awesome! Now for the fun/hard part of creating them! In my next post I'll show you how everything came together in the final paintings, and provide some thoughts to keep in mind about commissions in general, which I think will be of interest to the collector and artist alike.

The making of a commission

It's hard to believe summer is almost over. The move of my home and business, along with family matters, tended to completely monopolize my spring and summer, and yet there is still so much to do.   While we are slowly settling into the house, it will be some time before I have a studio. So I have "made do" with either painting outside in the blazing summer heat, or setting up a temporary studio with drop cloths in my poorly lit living room. For those reasons, my painting production has been down and it's been driving me a little crazy. Nevertheless, opportunity waits for no one, and commissions are a special kind of opportunity. Time to pull out the drop cloths and shop lights again! :-)  I have been painting for 20 years, and in that time, I've had a variety of commissions. Some are more "challenging", and some are pure delight. Of course, the latter are more pleasurable, but all commissions have been, to me, opportunities for growth as an artist.

My latest commission, in spite of my less than ideal work environment,  fell distinctly in the realm of the delightful. I met the client during a painting demonstration at the Little Gallery where my work was being featured in June. He happened to love one of my paintings in that show, called "The Potted Garden, Pienza":

pienzawf_final

The only issue was that the format (square) wasn't quite right. He was looking for a slightly larger, more vertical painting, and a companion piece of the same size to complement it in an adjacent spot.

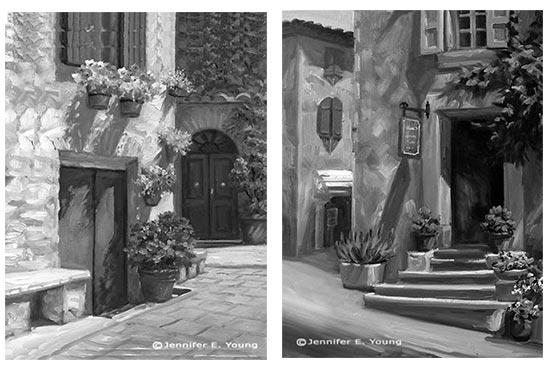
I loved this little scene and I was happy to explore it again with a different format. So my first task was to convert my square composition to a vertical piece. Luckily, the architectural subject matter leant itself to the task naturally, and I was able to use Photoshop to render a "sketch" for a proposal in much faster time than I would have been able to do free-hand:

grayscale composite mockup ©Jennifer E Young

As you can see, I didn't labor over rendering the upper portion. The purpose was just to continue it upward to demonstrate how it would look. (Photoshop is a very expensive program, but nothing beats it for working out compositional options for paintings!)

In all honesty, because the location of the focal point was in the right position for both the original 12x12"  and the commissioned 16x12" format,  I didn't have to do much to the composition of the original painting beyond extending it. That's not always the case, believe me, but this time things worked out really well. But because I was losing a window on the upper left, I did suggest that I replace the two flower pots under the window for a larger, single hanging basket, as this would give this area more unity.

Once I received the client's approval for my proposal of the first painting, I set to work finding a second composition that I would create as a companion piece. I'll cover that in the next installment. Stay tuned!

Watching the Waves

Here is the last plein air painting I did at the beach last week. It was a quickie, started around 4:30 or so and wrapping up around 6PM. Watching the waves is one of my favorite things to do when I'm at the beach.

Outer Banks plein air painting ©Jennifer E Young, All rights reserved "Watching the Waves" Water miscible oils on linen, 8x8" To purchase, please contact me!

What is it about the ocean that calls us so? I guess it is the mystery of it. Or maybe it's the rhythm of the tides? Or maybe it's just that it is the place where we all originated, and it's depths are still unknown. My daughter once asked me, "When does the ocean stop waving?" Exactly! It never does, though it never ceases in changing either.

Incidentally, as I was painting this little vignette of our neighbor with her blue striped umbrella, I was photographed by Hidden Outer Banks!

Jennifer Young plein air painting by Hidden Outer Banks

Check them out. It was perhaps the one time when I actually didn't mind having a picture taken in my bathing suit. ;-)

Morning Surf

Immediately after I wrapped up painting my sunrise painting, I turned to look up the beach toward the pier and noticed how lovely the waves looked lapping up on the curving shoreline. So since I finally felt like I was getting somewhere with these paints, I decided that this would be a back-to-back session, one piece after another. Here' s the beach in early morning, post sunrise, around 8:30 a.m. or so:

Plein air coastal beach landscape painting of the Outer Banks, NC ©Jennifer E. Young, All rights reserved"Morning Surf" Oil on Canvas, 9x12" Contact me to purchase!
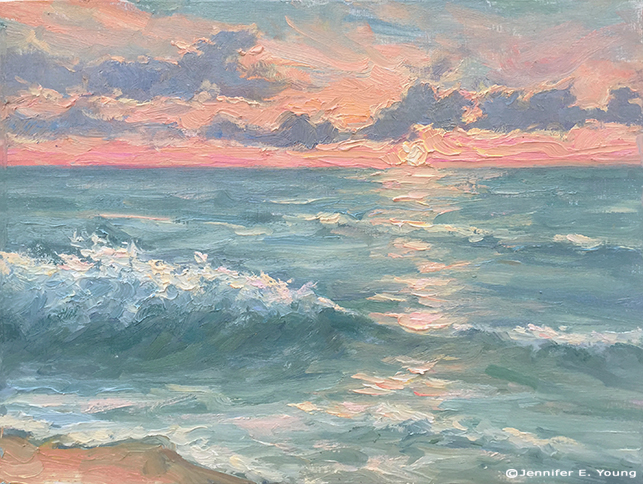
For this painting and the prior sunrise one I had to lay the paint on pretty thickly to manipulate the edges the way I wanted. Also I found the titanium white and cadmium yellow light were much less intense than what I was used to with my traditional oils, so the highlights were painted very thickly indeed. I hadn't noticed this in my first venture with the Water Soluble oils, but it became much more apparent with these beach paintings because they are pretty high key.  Overall the effect seems to me to be closer to a palette knife painting than one done with a brush, though hog bristle brushes were all that I used.

I really enjoy painting the surf. While I have done it before a number of times  in the studio, these pieces were  my first effort done completely from life. What a rush! I feel like I could spend a lifetime studying just this one subject...I should be so lucky.

Back from the beach

Last week my family made our annual trek to the Outer Banks of North Carolina. It is a trip I look forward to all year, and it always seems to be over all too soon. For this trip, I brought along my water soluble oils.  Given all of the moving and excitement we had this spring and summer, I thought I would simplify things a bit with the painting gear I chose to bring with me, and eliminate the need for carrying turpentine. The only problem with my little plan was that, unlike my first foray into this medium, I found myself struggling. A lot. I don't know if it was the humidity, the painting surfaces, my overall fatigue or what. But every painting I did all week was a complete wiper, in spite of my  most valiant efforts.  The paint seemed to completely lack body and intensity. It also seemed to do nothing but smear all over my surfaces when I applied them.

Finally on the night before the last full day, it dawned on me that I should try a more absorbent surface. When I paint with traditional oils my preferred surface is one that is quite smooth --a fine weave linen or a shellacked birch panel. It was my understanding that shellac wasn't going to fly with water soluble oils, and my linen wasn't doing the job at all. So I dug around in my supply of panels and came up with a couple of gessoed birch panels and a Pintura gessoed canvas panel and decided to throw the old Hail Mary on the final day.

Here is the  first piece I did that last day, at sunrise:

Plein Air painting of the Outer Banks, NC ©Jennifer E Young, All rights reserved

"Sunrise at Nags Head" Water miscible oils on panel, 9x12" Contact me to purchase.

Finally I painted 3 pieces that I actually felt happy with! The paint was still harder to control than my beloved traditional oils, and I had a harder time mixing the colors I was aiming for, but at least the paintings actually looked like something I could show and/or use for reference when painting larger pieces. I will post the other paintings from that day in the coming days. Stay tuned!

Color isolator

My 5 year old and I have started playing a little color game called, "What color is that exactly?"  I'm trying to show her that colors are not always what they seem. The ocean may seem "blue", but which blue, exactly? And is it all blue? Or is it the same blue, from horizon to shoreline? One way to hone your color discerning skills is by using a color isolator. A color isolator is nothing high tech. It's basically a small hole that one can peer through to "isolate" a particular color from all others in a scene, in order to achieve better color accuracy.

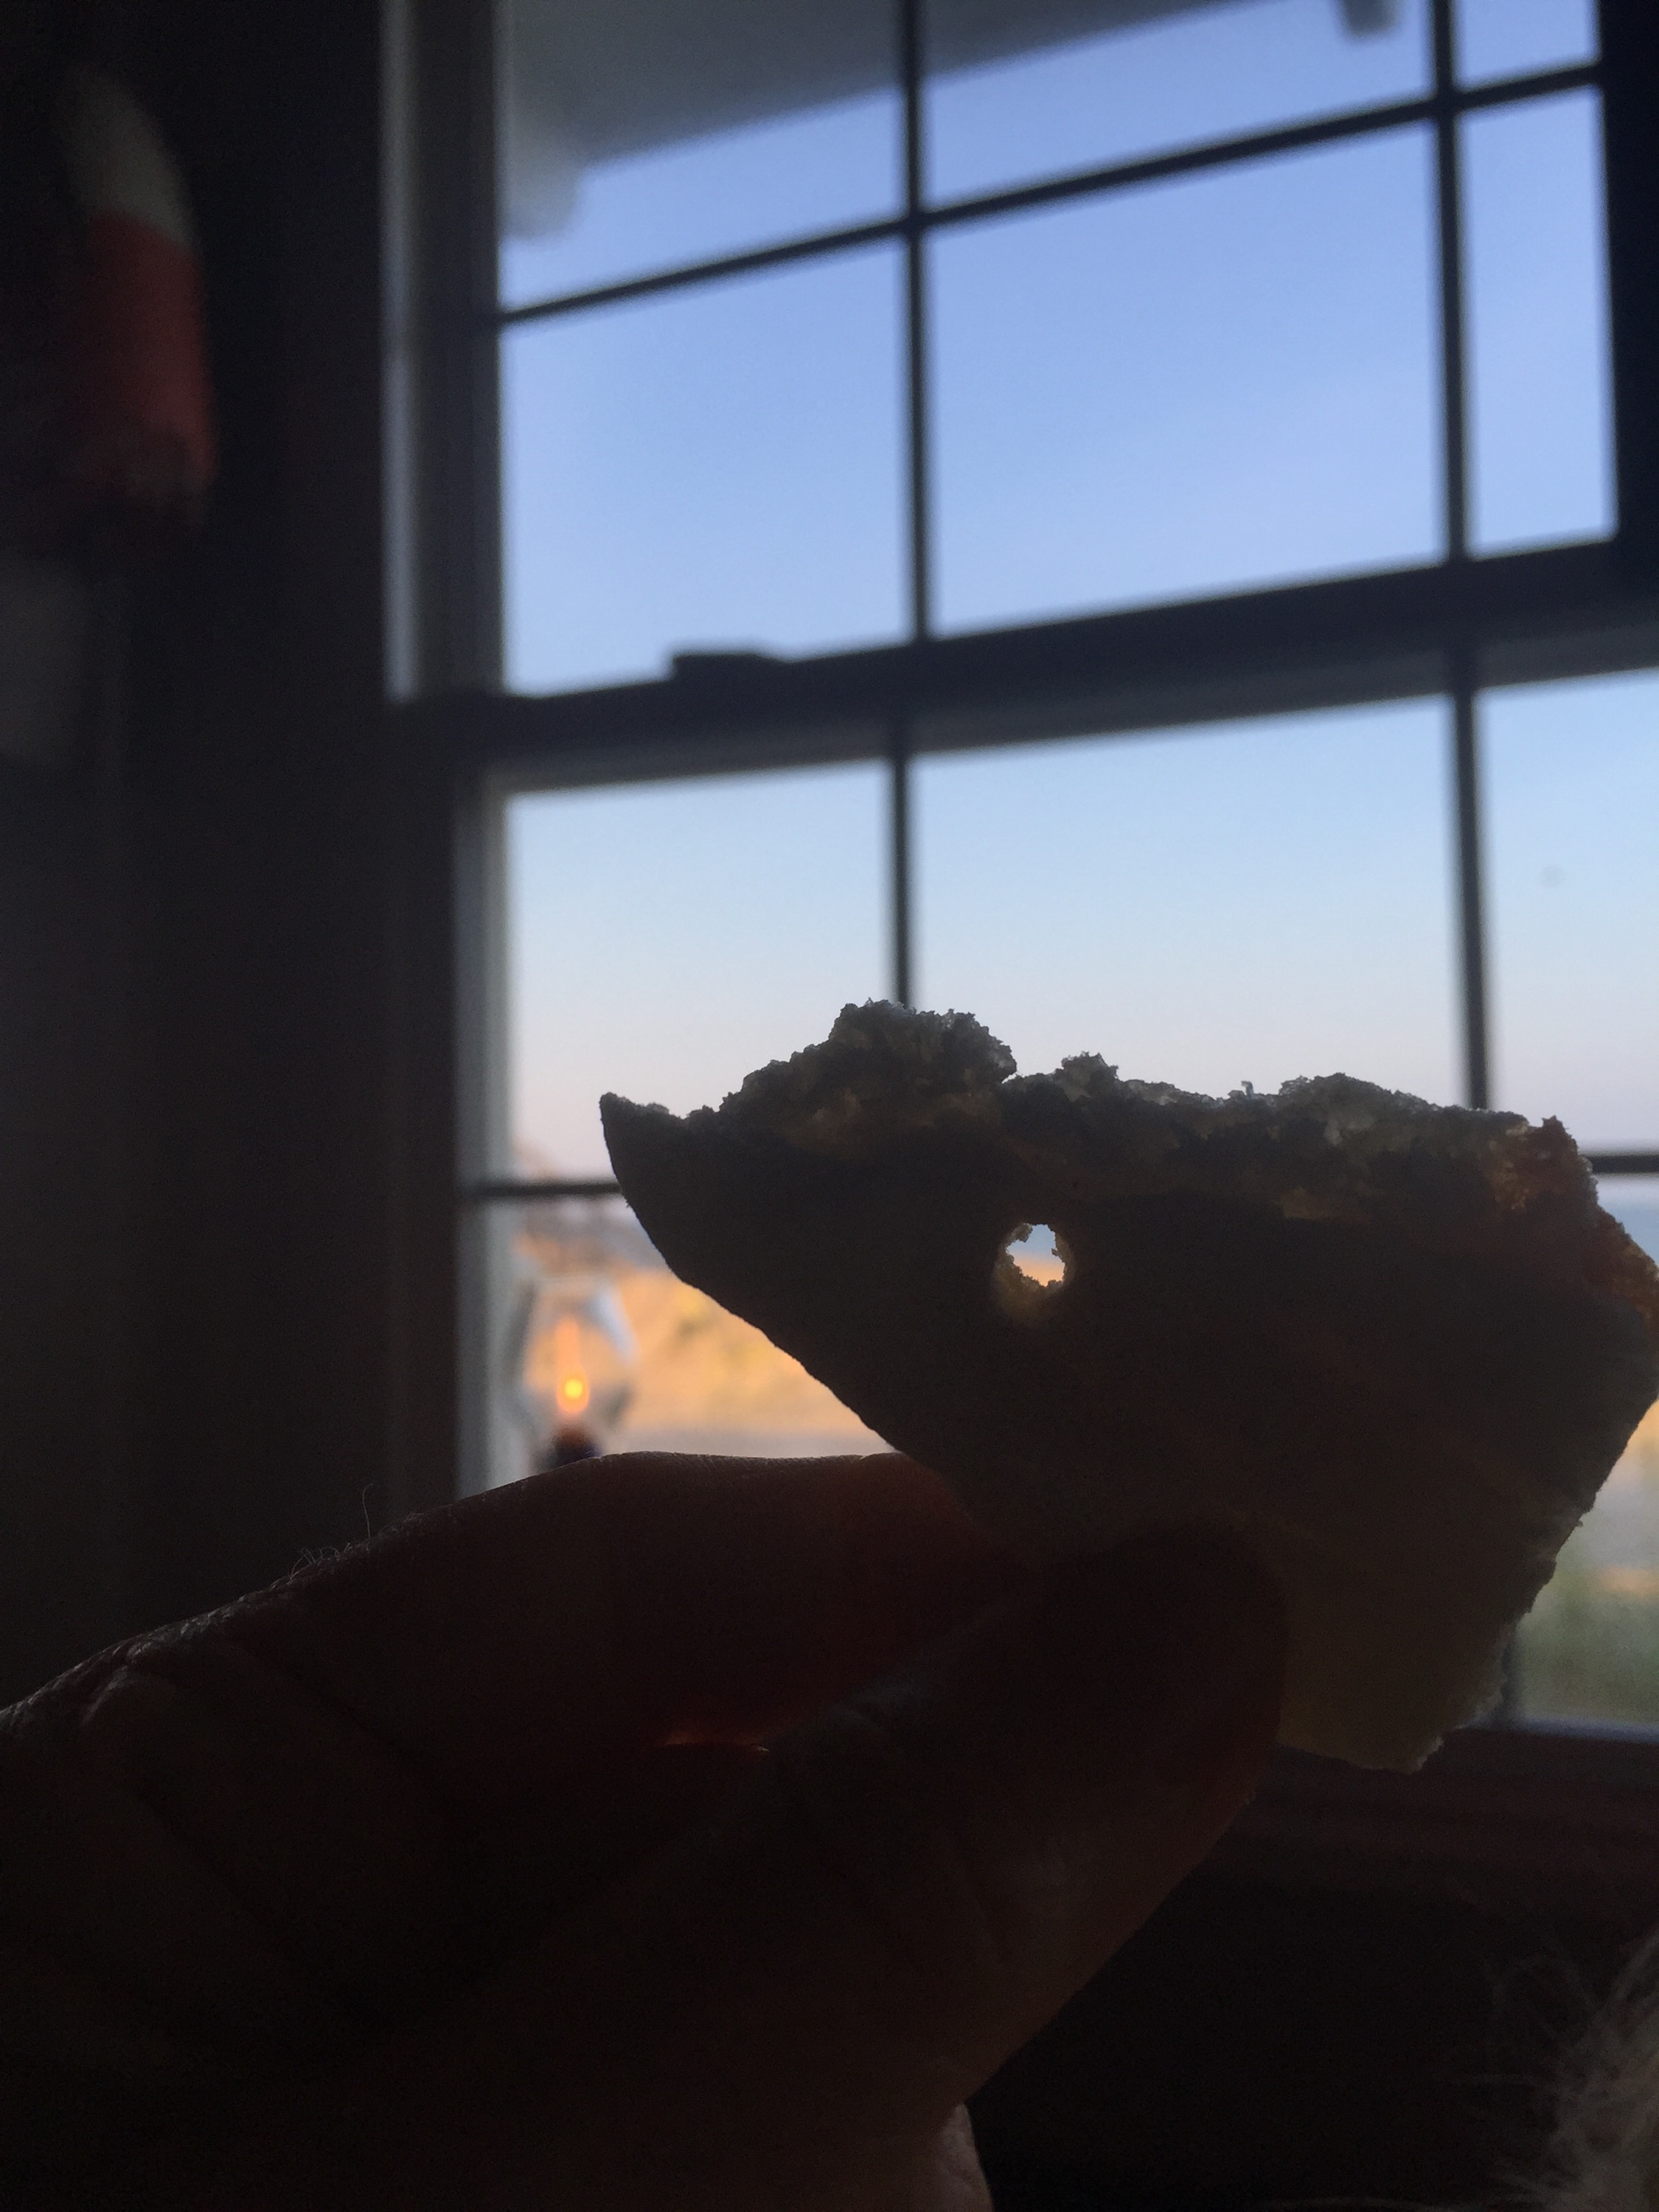
There are little art tools sold to achieve this purpose, or you can peer through the small hole at the end of your palette knife. In a pinch you can concoct a small hole by peering through your curled up fingers. Last night at the restaurant my daughter and I were peering through straws. We even made a hole in a piece of my daughter's pita bread.

  This worked really well, actually, though by this time my husband started trying to disassociate himself from the crazy people peeking at things through their appetizers.

The point is, by isolating a tiny portion of an object you eliminate the information overload that can often happen when painting outdoors, and it is easier to see the color and value more accurately.

Last Blush

I spent a really fun week visiting with my sister and her kids, so I've been a little silent here on the blog lately. I also find that I post so frequently to my Facebook page via mobile (and I've just started up with Instagram too) that I may miss an update or two on the blog. Silent no more! I  found myself pretty tired today, but since the hubs offered me a free morning of childcare so that I could paint, I couldn't pass it up. Once again,  I opted for a very short commute to the patio:

plein air still life floral painting © Jennifer E Young, All rights reserved "Last Blush" Oil on Linen, 8x10" To purchase, please contact me!
I never know whether to call paintings like these a still life or a plein air painting. I guess they are both! This potted hydrangea is one I carried over from the old house. It is still hanging onto its blooms, but they are fading now, from a bright pink to more of a dusty rose. I went back to traditional oils for this piece, mainly because I still have quite a supply of them and I may need to save the water miscible variety for when I need to paint indoors.

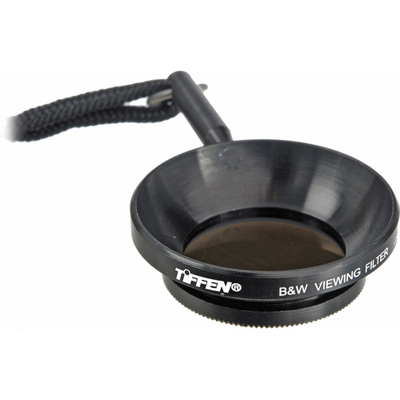
During this painting session I tried out a new little gizmo I've had my eye on for a while. It is the Tiffen #1 black and white viewing filter.

tiffen1

The vendor product info states:

"Often called the "Director's" filter this hand held filter converts color scenes to shades of black and white. It allows the photographer to "see" the black and white contrast and tone before finalizing the exposure."

It's pretty neat because you can wear the thing around your neck and hold it up to your eye with the little handle so as not to smudge the glass. I found it useful to check my values with it, especially the dark passages. But I'm not sure about the highlights. They seemed to appear a bit duller when peering through the filter. I may justI have to get used to using it for a while. I will report back after I have had a chance to use it a little more, but I think it might be a fairly helpful tool to check the value relationships in my work during my process, especially if they are in question.

First painting since the move!

After re-reading my post from yesterday I started to feel like a wimp, complaining about the heat and all. Then I tried it and realized that heat stroke does not improve your art one iota! All kidding aside, it was boiling lava hot outside on my patio. I only lasted about an hour before I decided I'd have to leave it until the next day, and pick up where I left off. And so I painted this piece over two sessions, noting the time of day and returning to wrap up at the same time this morning.

plein air garden painting by Jennifer E Young, All rights reserved "A Taste of Summer" Water soluble oils on Linen, 12x12" To purchase, contact me!
This little outdoor still-life setup includes the herbs and flowers I brought from my old place, as well as a big beautiful housewarming gift from our new neighbors (the pink and orange spray behind the basil). A  marriage of old and new,  I felt it was the perfect subject to kick off this new beginning.

I experimented with this painting using Cobra water-soluble oil paints by Royal Talens . I was inspired to try them when I started following the very talented painter Mark Hanson's discussions about them on Facebook and on his blog. I have friends who use water miscible oils, too, but having tried them before without success I haven't been compelled to try them again. But when Mark suggested that his migraine headaches may have gone away after switching to these oils, I took notice and decided to try this new (to me)  line of paints myself.

I have suffered from insomnia for years, and yet ever since we moved to the new house, I have only had two bad nights. That's pretty incredible! Coincidentally, with the exception of yesterday and today,  I have not painted since we've been here. Is it possible there is some other reason for my newfound improved sleep? Absolutely. But it's also possible the fumes were getting to me and I didn't even realize it. It has also bothered me for a while that I am eating as much organic and natural food as I can afford, I'm also inhaling volatile organic compounds on a daily basis in my work. And if we ultimately decide to set up my studio in our current attached garage, water soaked paper towels are  going to be a lot safer than ones soaked with mineral spirits, odorless or not!

I first tried water-soluble oils several years ago. I believe they were Winsor & Newton's Artisan series. At the time I found the handling too gummy and tacky and not to my liking at all. I may not have given them a fair shake though, because in recent weeks I have read that you really should not thin your paints with water or it will produce that tacky, gummy effect and make the paints rather dull and cloudy looking. Instead, Mark advised not to rinse off your brushes too much with water, but to just wipe off the brushes as much as possible in between color mixtures  instead, and save the water for the final cleanup. If needed, use a water miscible oil painting medium created specifically for these paints rather than water to increase viscosity.

That advice made a world of difference and I found myself painting without fighting with my materials. There was a slight difference in the handling and a few old habits to overcome, but nothing so difficult as to put me off. I would say they did not flow as easily for me as my traditional oils, and the color intensity was a tad weaker, but not by a tremendous amount. On the other hand, they have absolutely no odor and seem like they would be great for travel.

From what I have read so far, the drying time may be a bit longer than what I'm used to. But that should not be an issue for ole' Pokey, here. I do hope they dry well and evenly, without any dull passages or great shifts in color or value. I will report back on this if I notice anything remarkable. I look forward to experimenting more with these paints. I really hope these will be my new go-to paints, and that I can ditch the OMS once and for all!

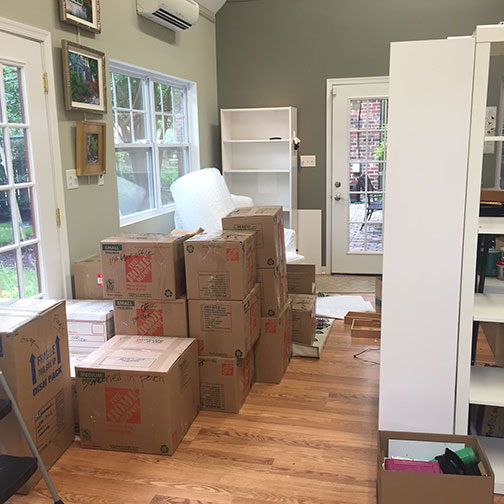
Advice: Don't ever help an artist move

Given that this is an art blog, I kind of have a thing against posting without pictures. But since it has been a while since I have posted at all, I felt I should give an update and reaffirm my presence in the land of the living. We have moved!   I have spent the last few weeks clearing out, packing up, moving in, and then doing it all over again with the studio. There is so much stuff!! My advice to you, if  you happen to know an artist who is moving, is to steer clear of them and don't come back until the dust settles! Moving an artist is the worst. I am thoroughly over it, mentally, that is. In actuality, though I am still slogging through  boxes, (and boxes and boxes!) and trying to set up a household. I have my eye on the prize though, and  am looking to the future.

I have no studio yet, and I think I can safely presume that this will be the case until at least the fall. That is probably OK since I am still trying to find out where I packed the toaster. But it would be more OK if I could look forward to painting outdoors. But though summer has just begun, it is already so blazing hot outside right now that even the cats are panting in the shade by 10 AM. Hopefully there will be a break in the weather soon.

We have a larger property now,  mostly in full sun. When we bought this place we envisioned building a studio with similar features to the last one, but with ample northern natural  light and in the exact location we desired (which was not the case in the city).

We still may end up doing that, but at present we are actually considering converting the pre-existing garage rather than building an entirely new structure. It is already north-facing, with foundation, electricity, and plumbing intact.  (What's not to love?) It could save us a considerable sum, and If I put my office in the house (and who really needs a formal living room any way?) I would have my own little wing, with a larger studio workspace and an office connected by a short hallway, just through the back door.

So that's where we are right now; mulling it over and consulting contractors. We are looking into a good solution for a "wall of windows" as well as an entry door, some supplemental (artificial) lighting, and some built-ins for storage. If it works out as we imagine it to, it could come together much more quickly and less expensively than the last studio build. Here's hoping, any way!

At first I was resistant to the idea of not having a free- standing office/studio. It was what I was used to, and it served me well for several years. But I am coming around to the idea of having the studio connected to the house, so I can enter it at all hours if I want to, without having to don boots and a parka to do so. I am also liking more and more the idea of a separate office.  I can easily allow myself to be interrupt- driven, and it will be nice to have that extra layer of impulse-control built in.

I posted ad nauseum about my last studio build, and since this will be a different animal, I will try to do the same this time around.  I hope to be posting again soon, too--about painting! And with some pictures to boot! In the meantime, if any of you out there have built a studio from a pre-existing garage and would like to chime in with some advice, I am all ears.

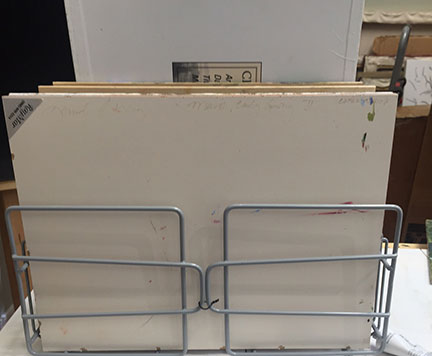
Super cheap wet panel holder

This week as I am plodding through the daunting task of packing up my studio, I have storage on my mind (as in, where the heck am I going to put all of this stuff?!) Granted, a number of these boxes are my office supplies and files, but let's face it; artists have a lot of stuff.

art studio storage tips

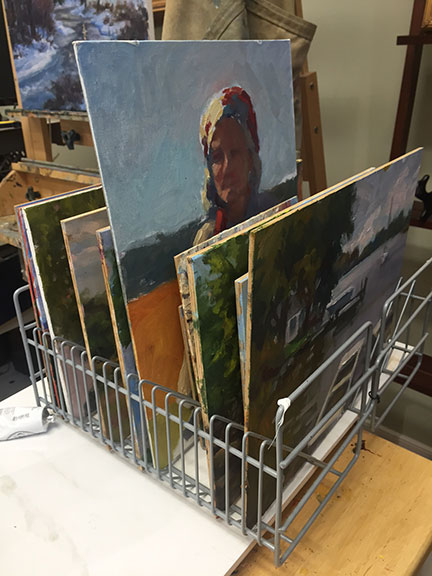
And so we painters are always trying to come up with nifty and cheap storage ideas that will protect our paintings when they are wet and keep them organized when they are dry. With that introduction, meet my cd storage racks turned painting panel holders:

studiorack1

This is about as low tech as you can get. Two CD holders are tied together with twist-ties on either side.

art storage ideas

These are also great to have in the car for plein air paitning trips. I put the whole setup inside of a box lid sized to hold them for added stability and reduced mess. It will hold painting panels up to 12" and keep them neatly separated from each other so that they don't touch.

Granted, CD holders are becoming a little harder to find as we move further into the digital age, but they are still around. If push comes to shove, a letter sorter from an office supply store will do.

art storage tips


A perfect morning at the river

The last couple  of times I went out plein air painting, I faced some pretty gray wet days. The gray days are, for me, always the hardest. Things don't flow as easily with those close value ranges, and I don't get as excited about composing without the drama of the light. Don't get me wrong. I love a painting filled with gorgeous muted color and subtle grays, but a successful painting of lovely grays (not mud)  is not as easy to achieve as it might seem. Luckily, Tuesday, the sun was shining. It was also my last, long open day not scheduled with house stuff, moving, or preschool parties. So I and a couple of  painting buddies met down at the James River on Belle Isle to do a little painting.

I love this place. I have gone on several hikes around Belle Isle (which I highly recommend doing if you are in RVA). It's a fascinating place, from the trek on high over the footbridge that straddles the James River, to it's dark legacy as a  former Confederate POW camp during the Civil War.  Earlier still, it was also a pre-English settlement fishing ground for the Native Americans.

But aside from some historic markers and some large boulders used as cemetery markers, there is not much left from those eras to remind us. Nature has largely reclaimed it today, making it a beautiful spot for wildlife watching, sunbathing, or  kayaking on the class IV Hollywood rapids.

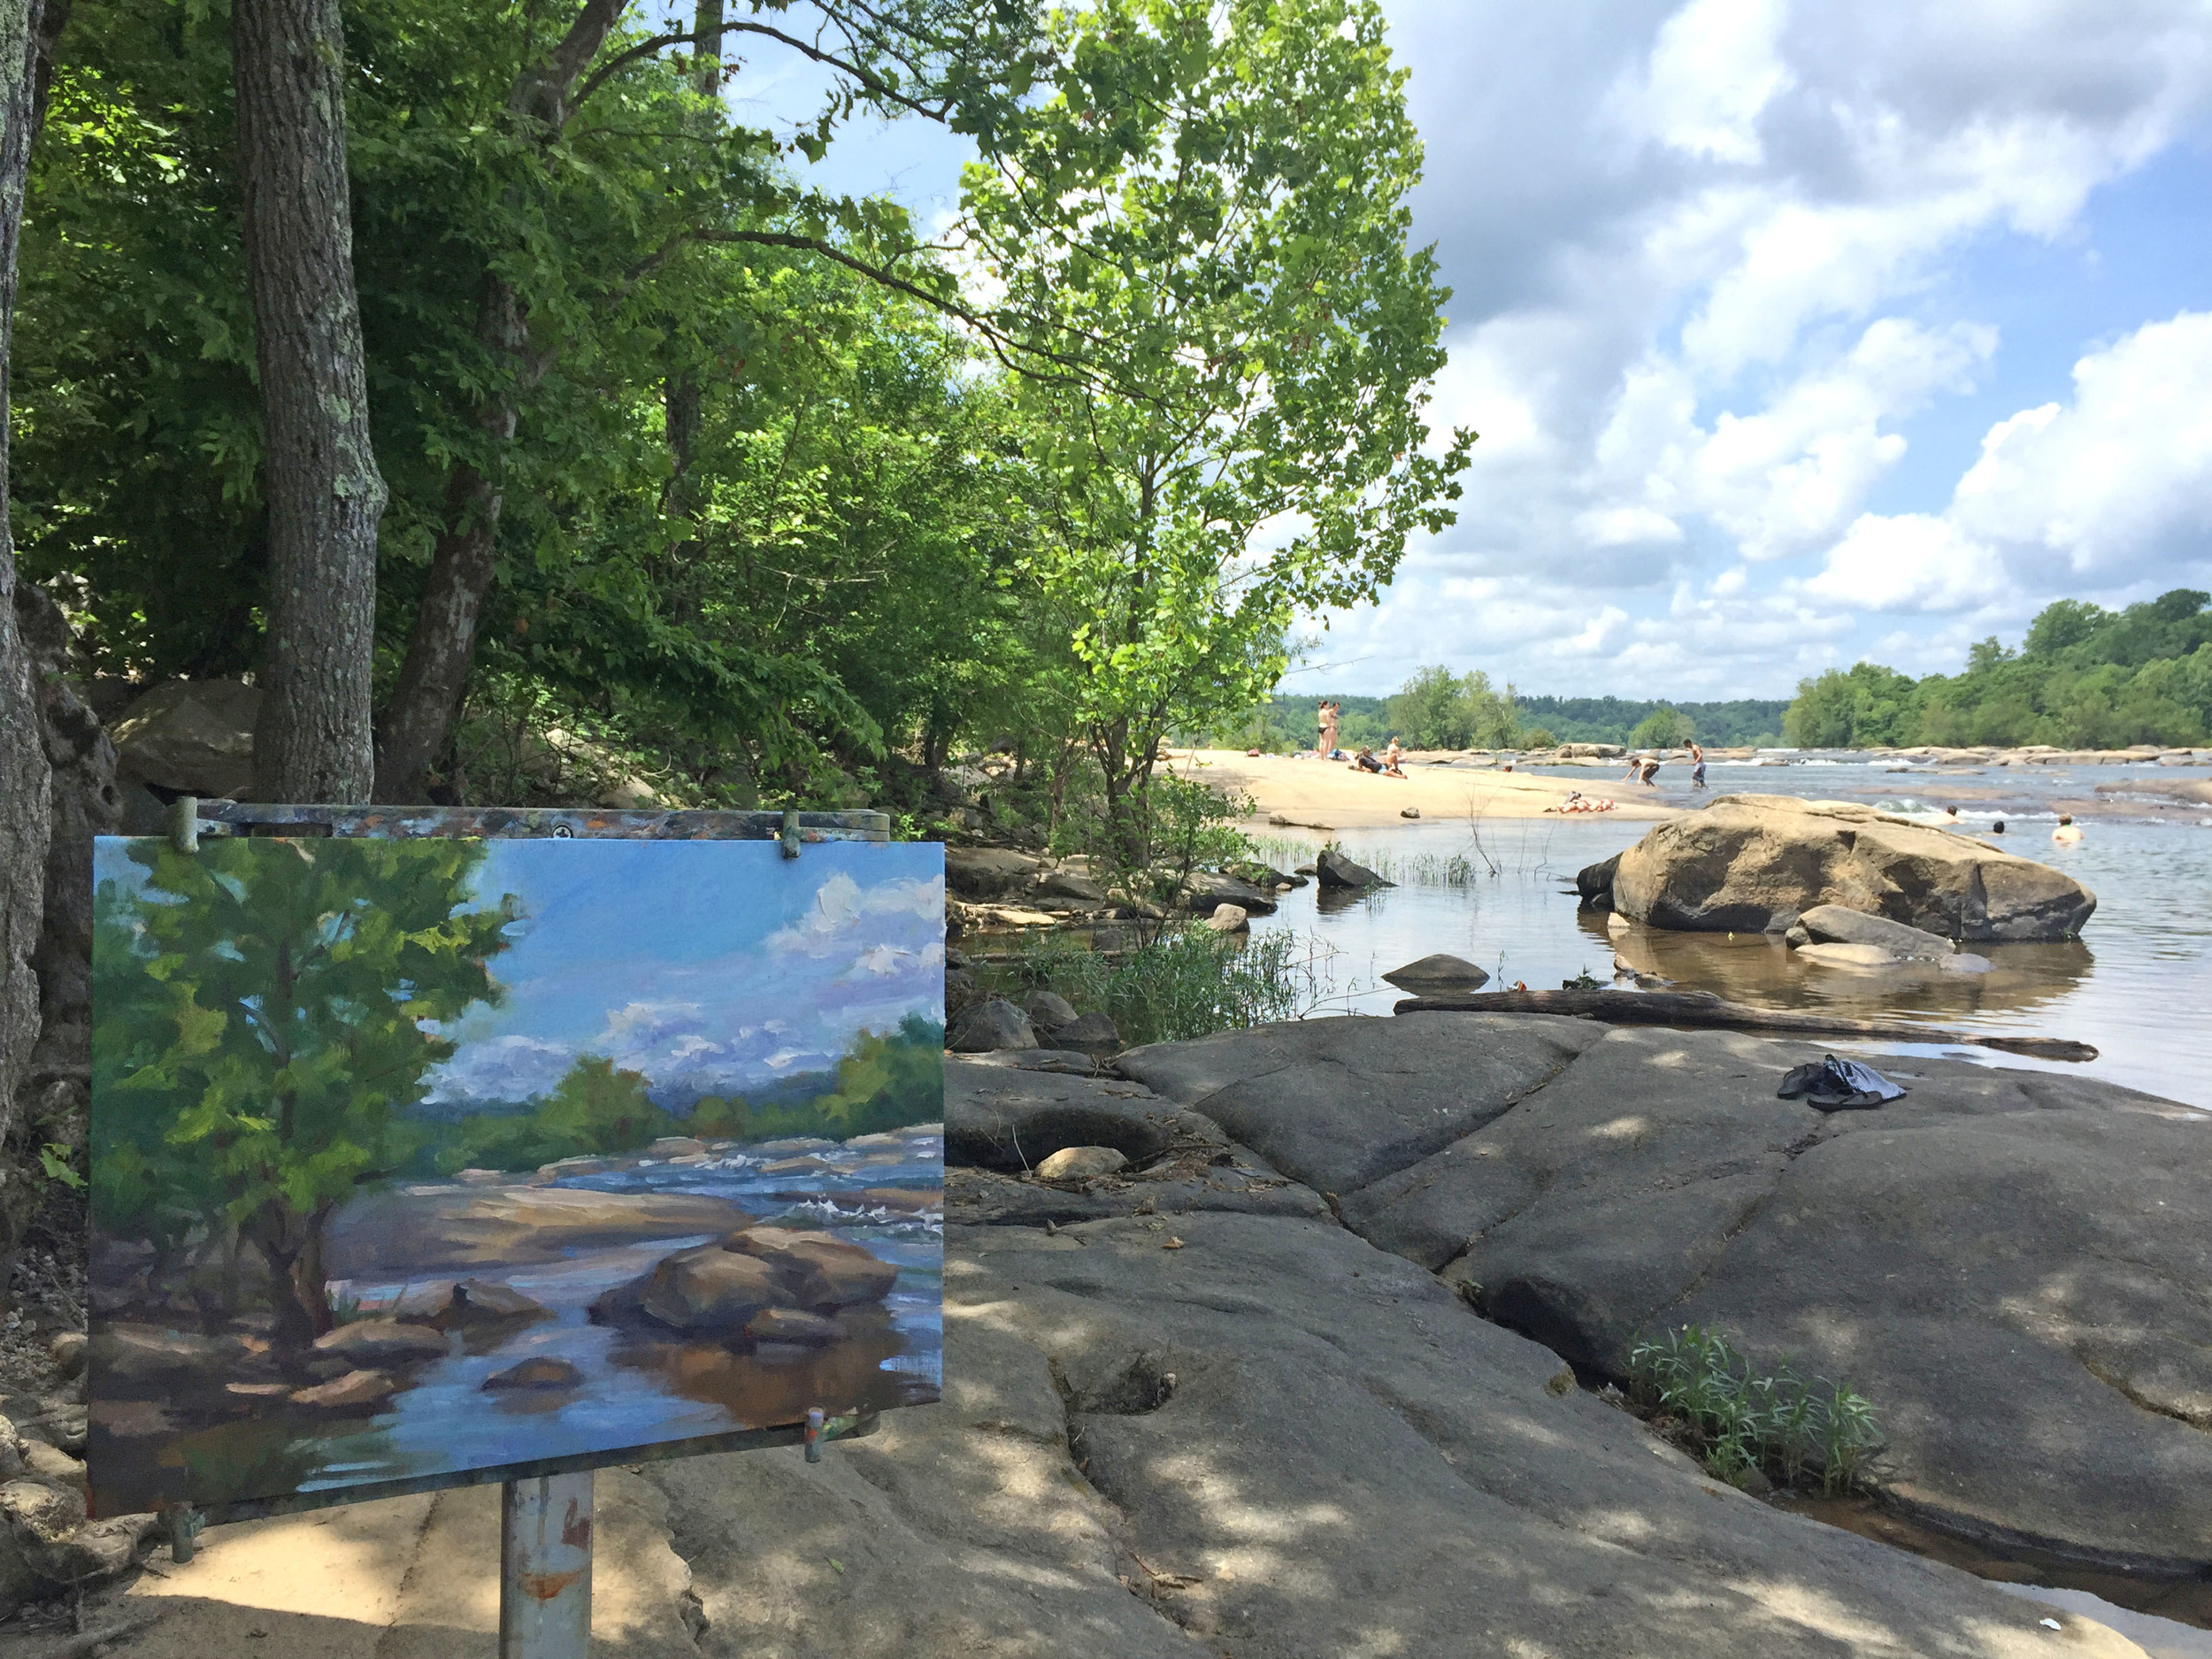
We set up at various points along some of the big flat rocks at the Rapids. Practically our only other companion when we first arrived was a beautiful gray heron sunning itself on a nearby rock. Later the sunbathers came, but they only added to the feeling that I was on a mini vacation being lulled by the sound of rushing water all around me.

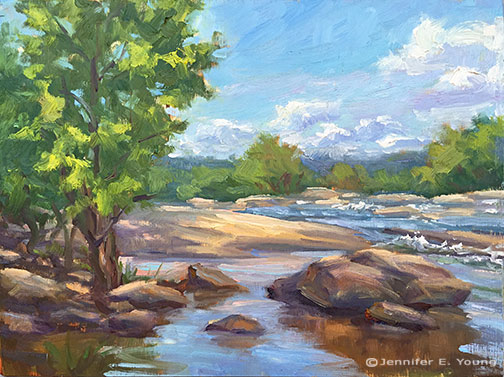
Plein air painting of the James River by Jennifer E Young "Morning at Belle Isle" Oil on panel, 9x12" Contact me to purchase!

This was a practice in painting rocks. The large rock in the foreground was mostly in shadow, with just a few dapples of light peeking through the shade of the nearby trees. Once that large rock started getting lit up I knew I'd better wrap it up.

James River Painting in progress by Jennifer E Young

I'm still working on my plein air speed. I may be spending a little too long getting myself set up just so, but each time I go out I feel like I am getting a little bit more comfortable outdoors again. I am not exactly a novice to plein air painting, but life demands have kept me more often in the studio these last several years, and it's been hard to keep up a momentum or a rhythm painting outdoors. For me,  it's one of those things where you either use it or lose it, but I am determined to get my plein air painting chops back! Hopefully once we move and settle in the new house (a matter of a couple of weeks now) I will be able to "use it" even more.


Delphiniums in the Rain

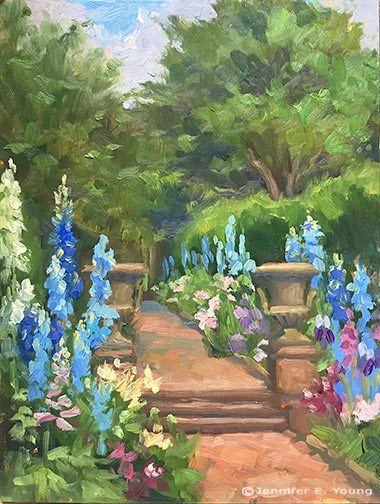
We are in the final push to put our current home on the market this week, so when I woke up this morning looking at the very gray sky and the mountain of work I had to do at home, I almost didn't go out to paint. Luckily my darling husband wouldn't hear of my excuses and practically kicked me out the door. ;-) I had been invited to paint with friends in this beautiful walled garden at a private turn-of-the-century residence tucked back in rolling hills near the banks of the James River. The drive up to the site was stunning in itself. Beautiful bucolic fields were lined with stately mature trees of all kinds. But it wasn't until I entered the garden past the roses and rounded a corner to take in this view that I audibly gasped. I remember my first thought when I saw this beautiful flower lined walkway was that I hoped I had brought the right blues.

Garden plein air painting by Jennifer E Young "Delphiniums at Redesdale" Oil on panel, 12x9" Contact me for purchasing info!

I am told that this garden was designed by Charles Gillette, who is pretty famous around Virginia for his formal garden designs on stately homes such as Agecroft Hall, The Virginia House, and Tuckahoe Plantation. I believe he also had a hand in some of the early designs of the  Lewis Ginter Botanical Gardens.

The rain fell softly off and on during this painting. Every once in a while sunlight and a bit of blue sky peeped through, but luckily not enough to "ruin" my cloudy day painting. At several points things got pretty soggy, and I found myself jostling my brushes, paper towels, and my painting umbrella, which I was using as a rain umbrella for myself, my painting, and my palette. But it all worked out in the end, so I guess that's what matters!