Lake Como Painting Progression (continued)

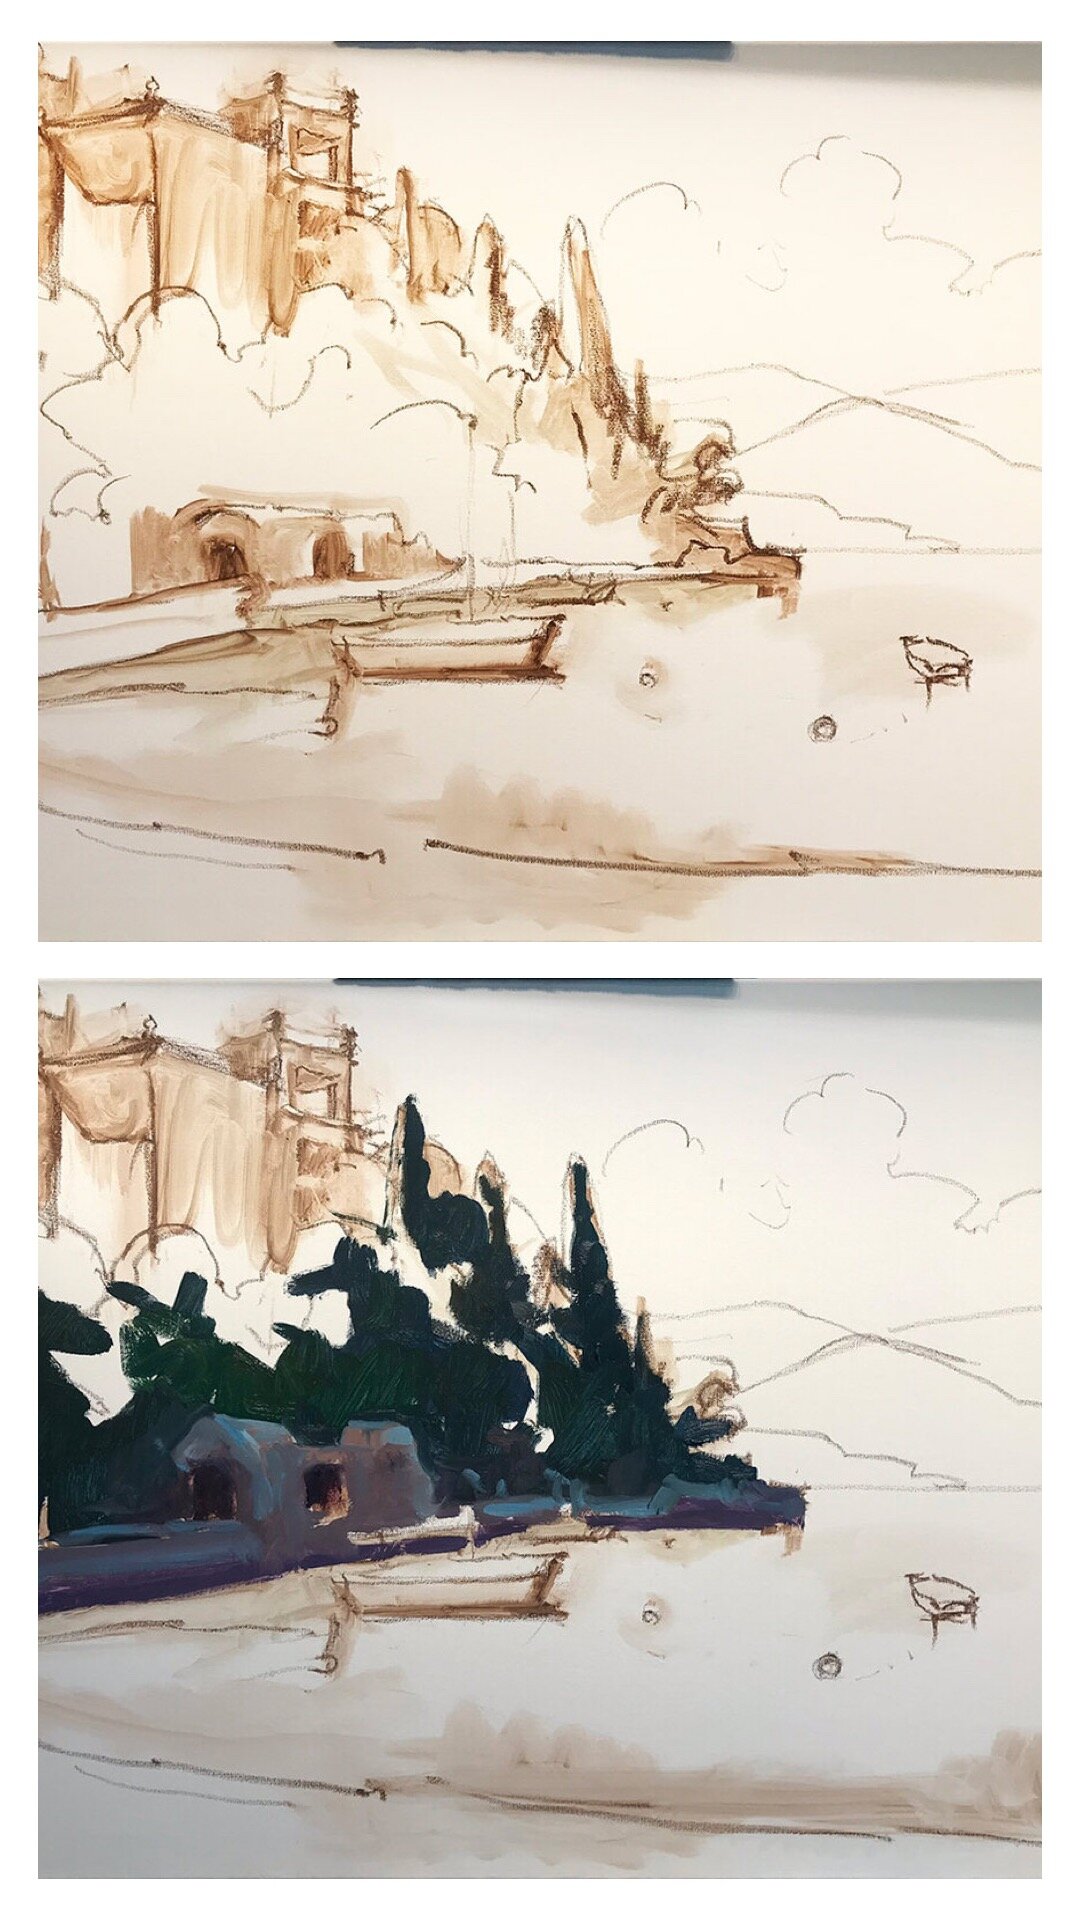
Well the time has really gotten away from me this week, as we are in the home stretch of my daughter’s “learn from home” work for her last weeks of fourth grade. But I HAVE been making progress on my painting of Varenna, the start of which I shared in my prior post.

First things first… I thought before going any further I would share a little about the colors currently on my palette, and what I’ve been using to work on this piece.

palette2.jpg

I will start by saying that this is a pretty big palette of colors for me, and definitely larger than what I use for my field work. But because I have such limited studio time, it helps to have a few more “convenience colors” to work with so I don’t spend so much time mixing. Plus look at those yummy colors. Sometimes it is just plain fun to indulge in them, as long as I don’t have to carry them around in my backpack! The paints listed with an asterisk* by their name are the kinds of colors I nearly always use. This is basically a double primary palette with the addition of an earth (brown pink) and a “black” (Payne’s Gray, which is really almost a dark blue).

I pretty much always lay my basic palette out the same way in a clockwise fashion. So for instance, starting with my earth colors in the lower left, I move up to white, which is always in my upper left, followed by colors from warm to cool, generally speaking. This palette has varied over time with a few colors added, or removed, or others substituted from time to time when I want to experiment. For instance, my two reds used to be Cadmium Red Light and Alizarin Crimson, but I switched to a cooler Napthol Red for my “warm” because when tinted it makes a cleaner, less orangey pink. I will use Quniacridone Violet in a similar manner to my former Alizarin Crimson for nice dark purples or browns, to modify other colors.

If you are new to painting I would recommend starting out with a double primary palette (a warm and cool of each primary color, yellow, red, and blue) plus white, and then slowly adding new colors over time as you get a good handle of what your primaries can mix. You might be surprised at what even a single primary palette can do.

Okay, enough palette talk for now. Let’s recap;

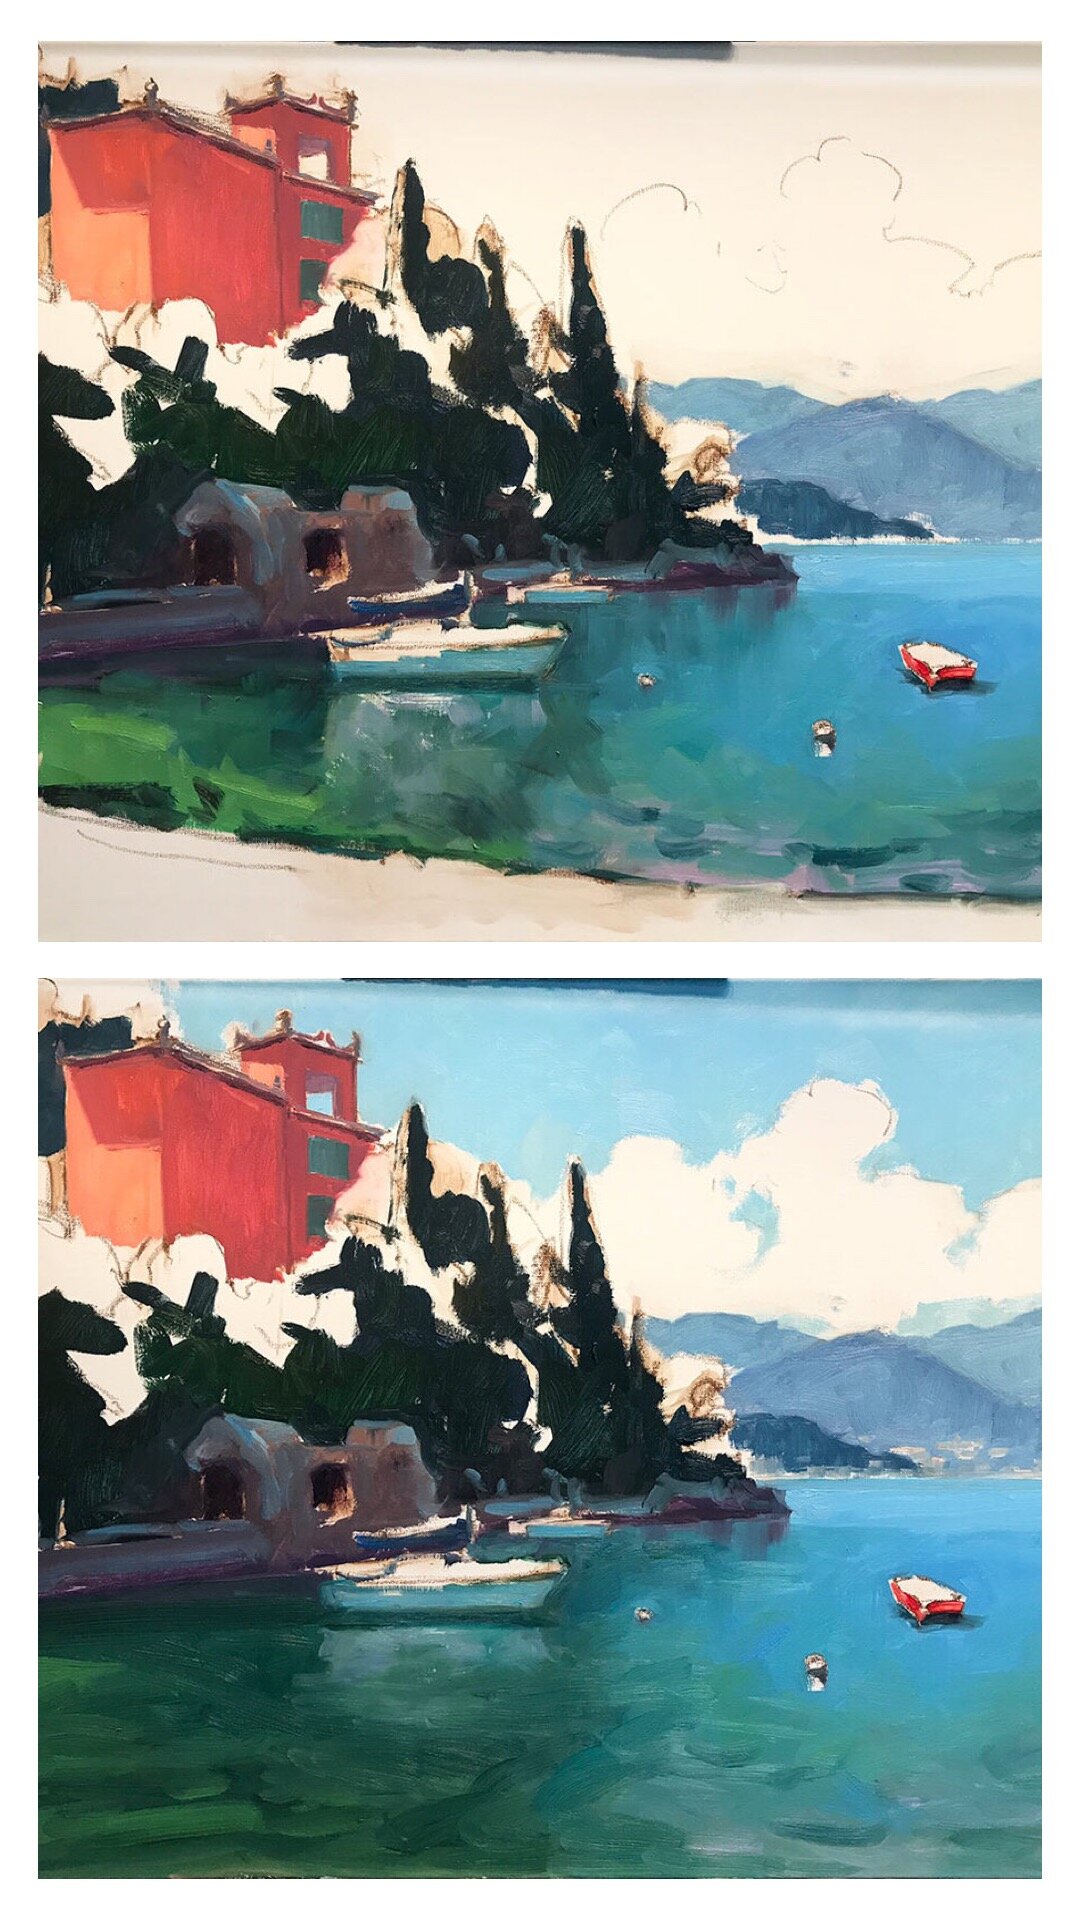
It’s time to address the rest of that white canvas by adding color to the lit side of the trees

varenna_demo_jenniferyoung

I also start addressing a few of the details of the foreground including boats and walkway to the town of Varenna.

varenna_demo_jenniferyoung

And finally (with a big caveat that this color is off because I was working on the painting at night and photographed it without the benefit of daylight) I start to address the masts, water, and clouds.

varenna8.jpg

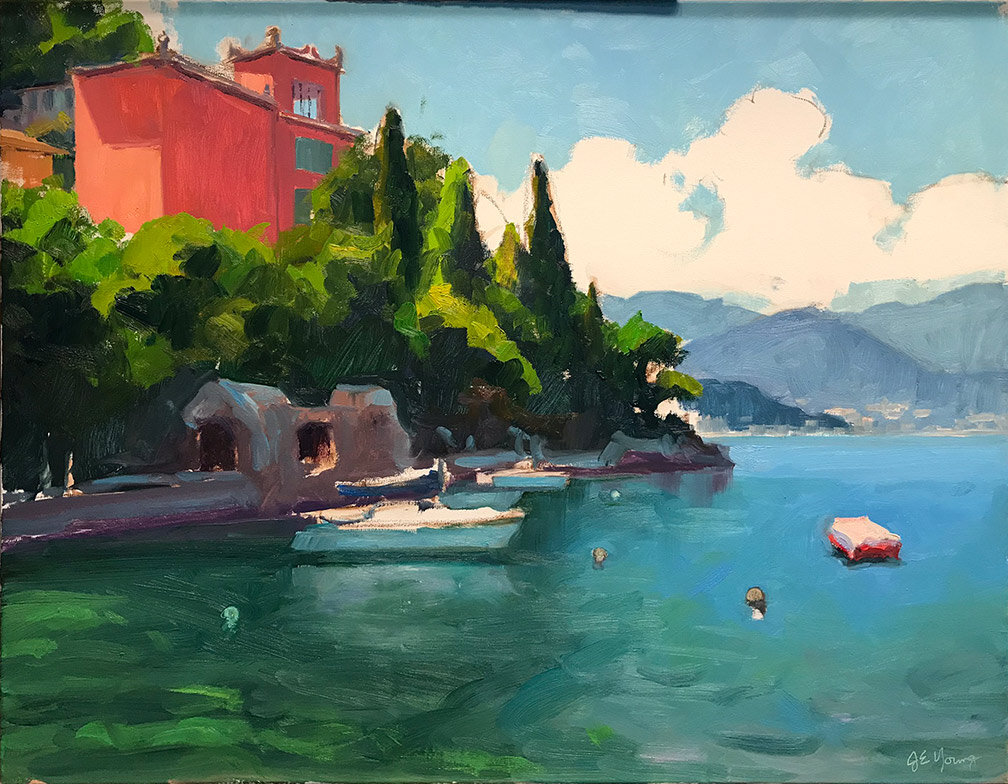
At this point I am going to sit with the painting for a day or two and may “tweak” it here and there, but I am close. I will post the finished piece, (photographed in better lighting) when I do. ***UPDATE*** See the final painting here.

Marinating, then celebrating!

I completed this painting (or so I thought) a short time before we left for our annual summer trek to the beach. I really liked it, for the most part. And having considered it finished, I stuck it up on my studio wall before our trip. After our return though, I started looking at it with fresh eyes. Some things that tugged on me before were now really starting to become more bothersome. But I decided to let it marinate a while longer as I was distracted with other projects. 

surfside1_jenniferyoung

Finally, I decided that while I liked the overall mood in this piece, I did not like the little closed umbrella to the left of my grouping of sunbathers. It kept pulling my eye away from where I wanted to go, and it was sort of an ambiguous object sitting there. Still I wanted something near that spot that would perhaps pull the painting together a little better. So I began flipping through my trip photos for some ideas and inspiration, and came across a snap of a little boy digging intently in the sand. I sketched it out quickly in a nearby notebook and set to work. 

boy_surfside_sketch.jpg

There wasn't a lot of built up texture where the umbrella was, so I only had to scrape it down just a little bit with a razor. Then I proceeded with a little "oiling out"  (in this case with just a little gambol and solvent free fluid) to help the new paint layer adhere to the older but still very fresh under layer. Here is the revised painting with the little boy. I also brightened the sky a bit more as it was feeling a bit intense and heavy.  

"Surfside", Oil on linen, 20x24" ©Jennifer E Young

"Surfside", Oil on linen, 20x24" ©Jennifer E Young

Here's a detail of the figures: 

"Surfside" (Detail) ©Jennifer E Young

"Surfside" (Detail) ©Jennifer E Young

I don't know about you, but I like this much better, and I find it finally worthy of celebrating with a frame and a signature.  :)

Plein Air to Studio

Though I have a great love for plein air painting and do it as often as my time and circumstances allow,  I have, out of necessity, become much more of a studio painter these last few years. Working on location is like painting calisthenics. It demands one's full concentration, advance planning, additional travel time, and a good amount of in-the-moment ingenuity in order to capture the particular color notes and light effects of that point in time. As with physical exercise, I get both an exhilarating rush and a bit of a drain afterwards. 

5:30 a.m. wake-up time ensured that I captured this sunrise in all of its colorful glory. As you can see, all of that color was long gone when I photographed the setting at around 7 a.m.

5:30 a.m. wake-up time ensured that I captured this sunrise in all of its colorful glory. As you can see, all of that color was long gone when I photographed the setting at around 7 a.m.

While I love the spontaneity in my plein air work, my studio work has its advantages. For one I can be more deliberate. Without the limitations imposed by time and changing light, I can go larger in the studio, and at times, improve on my drawing and composition. I can also experiment more easily with various formats, color combinations, and other formal aspects of 2D artistry. 

While I have been engaged in both practices for many years now, I want to do more to relate the two disciplines to each other in a more purposeful way. Part of the reason I haven't always managed this is because I tend to consign my plein air paintings to galleries almost immediately after I complete them, which means I am separated from them for either the length of the consignment, or forever if the painting is sold outright. I do have photographs of all of my plein air paintings as well as photographs of the location (though as you can see above,  the latter often tells me very little about the true color I saw in the moment.)

Therefore I'm making a concerted effort to do more plein-air to studio paintings, using the actual plein air paintings as my primary reference when at all possible. Here's my most recent effort:

"New Day Rising", Oil on linen, 20x24" ©Jennifer E Young

"New Day Rising", Oil on linen, 20x24" ©Jennifer E Young

Here's my setup, in progress. I used my tablet holder to prop up my plein air painting so that both pieces would be under the same light for better color accuracy. It actually worked very well. Necessity is indeed the mother of invention!  :) 


Painting solvent-free with traditional oils

Readers who have followed my blog for any length of time may know that I have been in pursuit of solvent-free painting methods for some time. My reasons are two-fold; it's better for my health and I simply don't like the mess of dealing with solvents on a regular basis.

So for the last 10 months or so, I have been painting pretty exclusively with Cobra water miscible oil paints by Royal Talens for my studio work, though I still used traditional oils outdoors for plein air painting. This worked fine, though I still struggled with certain aspects of my chosen materials. In the studio, while the Cobra paints worked really well and complemented my working methods, in other respects I missed the depth and richness that certain colors in my traditional oils  provided to me. On the flip side, I still really hated having to carry around solvents when plein air painting. Both the weight of the liquid and especially the mess of pouring and emptying the solvents really bothered me.

So, after listening to artist Leslie Saeta's excellent Artists Helping Artists podcast featuring an interview with Robert Gamblin, (of Gamblin Artist Colors) I took special note of their discussion surrounding Gamblin's relatively new line of solvent-free gels and mediums. I will admit I have known about these mediums for a while, and even have some of them in my studio. But in truth I haven't done much with them, because other than thinning my oils in the beginning stage and cleaning my brushes between strokes, I don't use painting mediums and so I really wasn't sure how they would benefit me.

But in this podcast, when I learned that you can actually use solvent free gel to clean your brushes during the painting session, well, that got my attention. I can use my beloved traditional oils without a can of messy solvents in my backpack? Now you're talking!

"At the Ready", Oil on linen, 16x20" ©Jennifer E. Young

"At the Ready", Oil on linen, 16x20" ©Jennifer E. Young

To experiment with the working properties of the method discussed, I executed the above painting in the studio. I did use a small amount of Gamsol in the beginning stages of my painting to adhere to the fat-over-lean principle of painting in oils. But I can carry this in a small container (a repurposed bottle no larger than an eyedropper that it once held my Argan face oil)  to squirt out a just little onto my palette for whatever small amount of thin washes I may need.  After that point, though, I paint with mostly just paint, maybe using the solvent free gel to get a little bit of slip in my stroke when needed, but mostly for cleaning off my brushes between strokes.

For clean-up on site, I wipe my brushes clean with the medium, maybe with one last squirt of Gamsol from my little bottle, before packing everything up . The final clean up takes place back in the studio. Different artists use different things to wash their brushes, from Murphy's Oil Soap to baby oil to plain old soap and water. I've used these too, but my favorite is Master's Brush Cleaner. This stuff comes in a tub and lasts forever. I can't even remember when I bought my current tub and I'm only about 1/3 of the way through. I just wet my brushes, swish them around in the tub, and the remaining paint is easily washed out under water. Something about this stuff seems to really get the oil residue off of the bristles and condition them at the same time. I don't know what's in that magic tub, and I'm not sure I want to know. But it seems pretty innocuous, though I always wear my gloves now when handling my art materials.

I'm really happy to be reunited with my traditional oil paints. I still like the water miscible oils, but it's hard to shake that first love, and now, it seems, I don't have to.

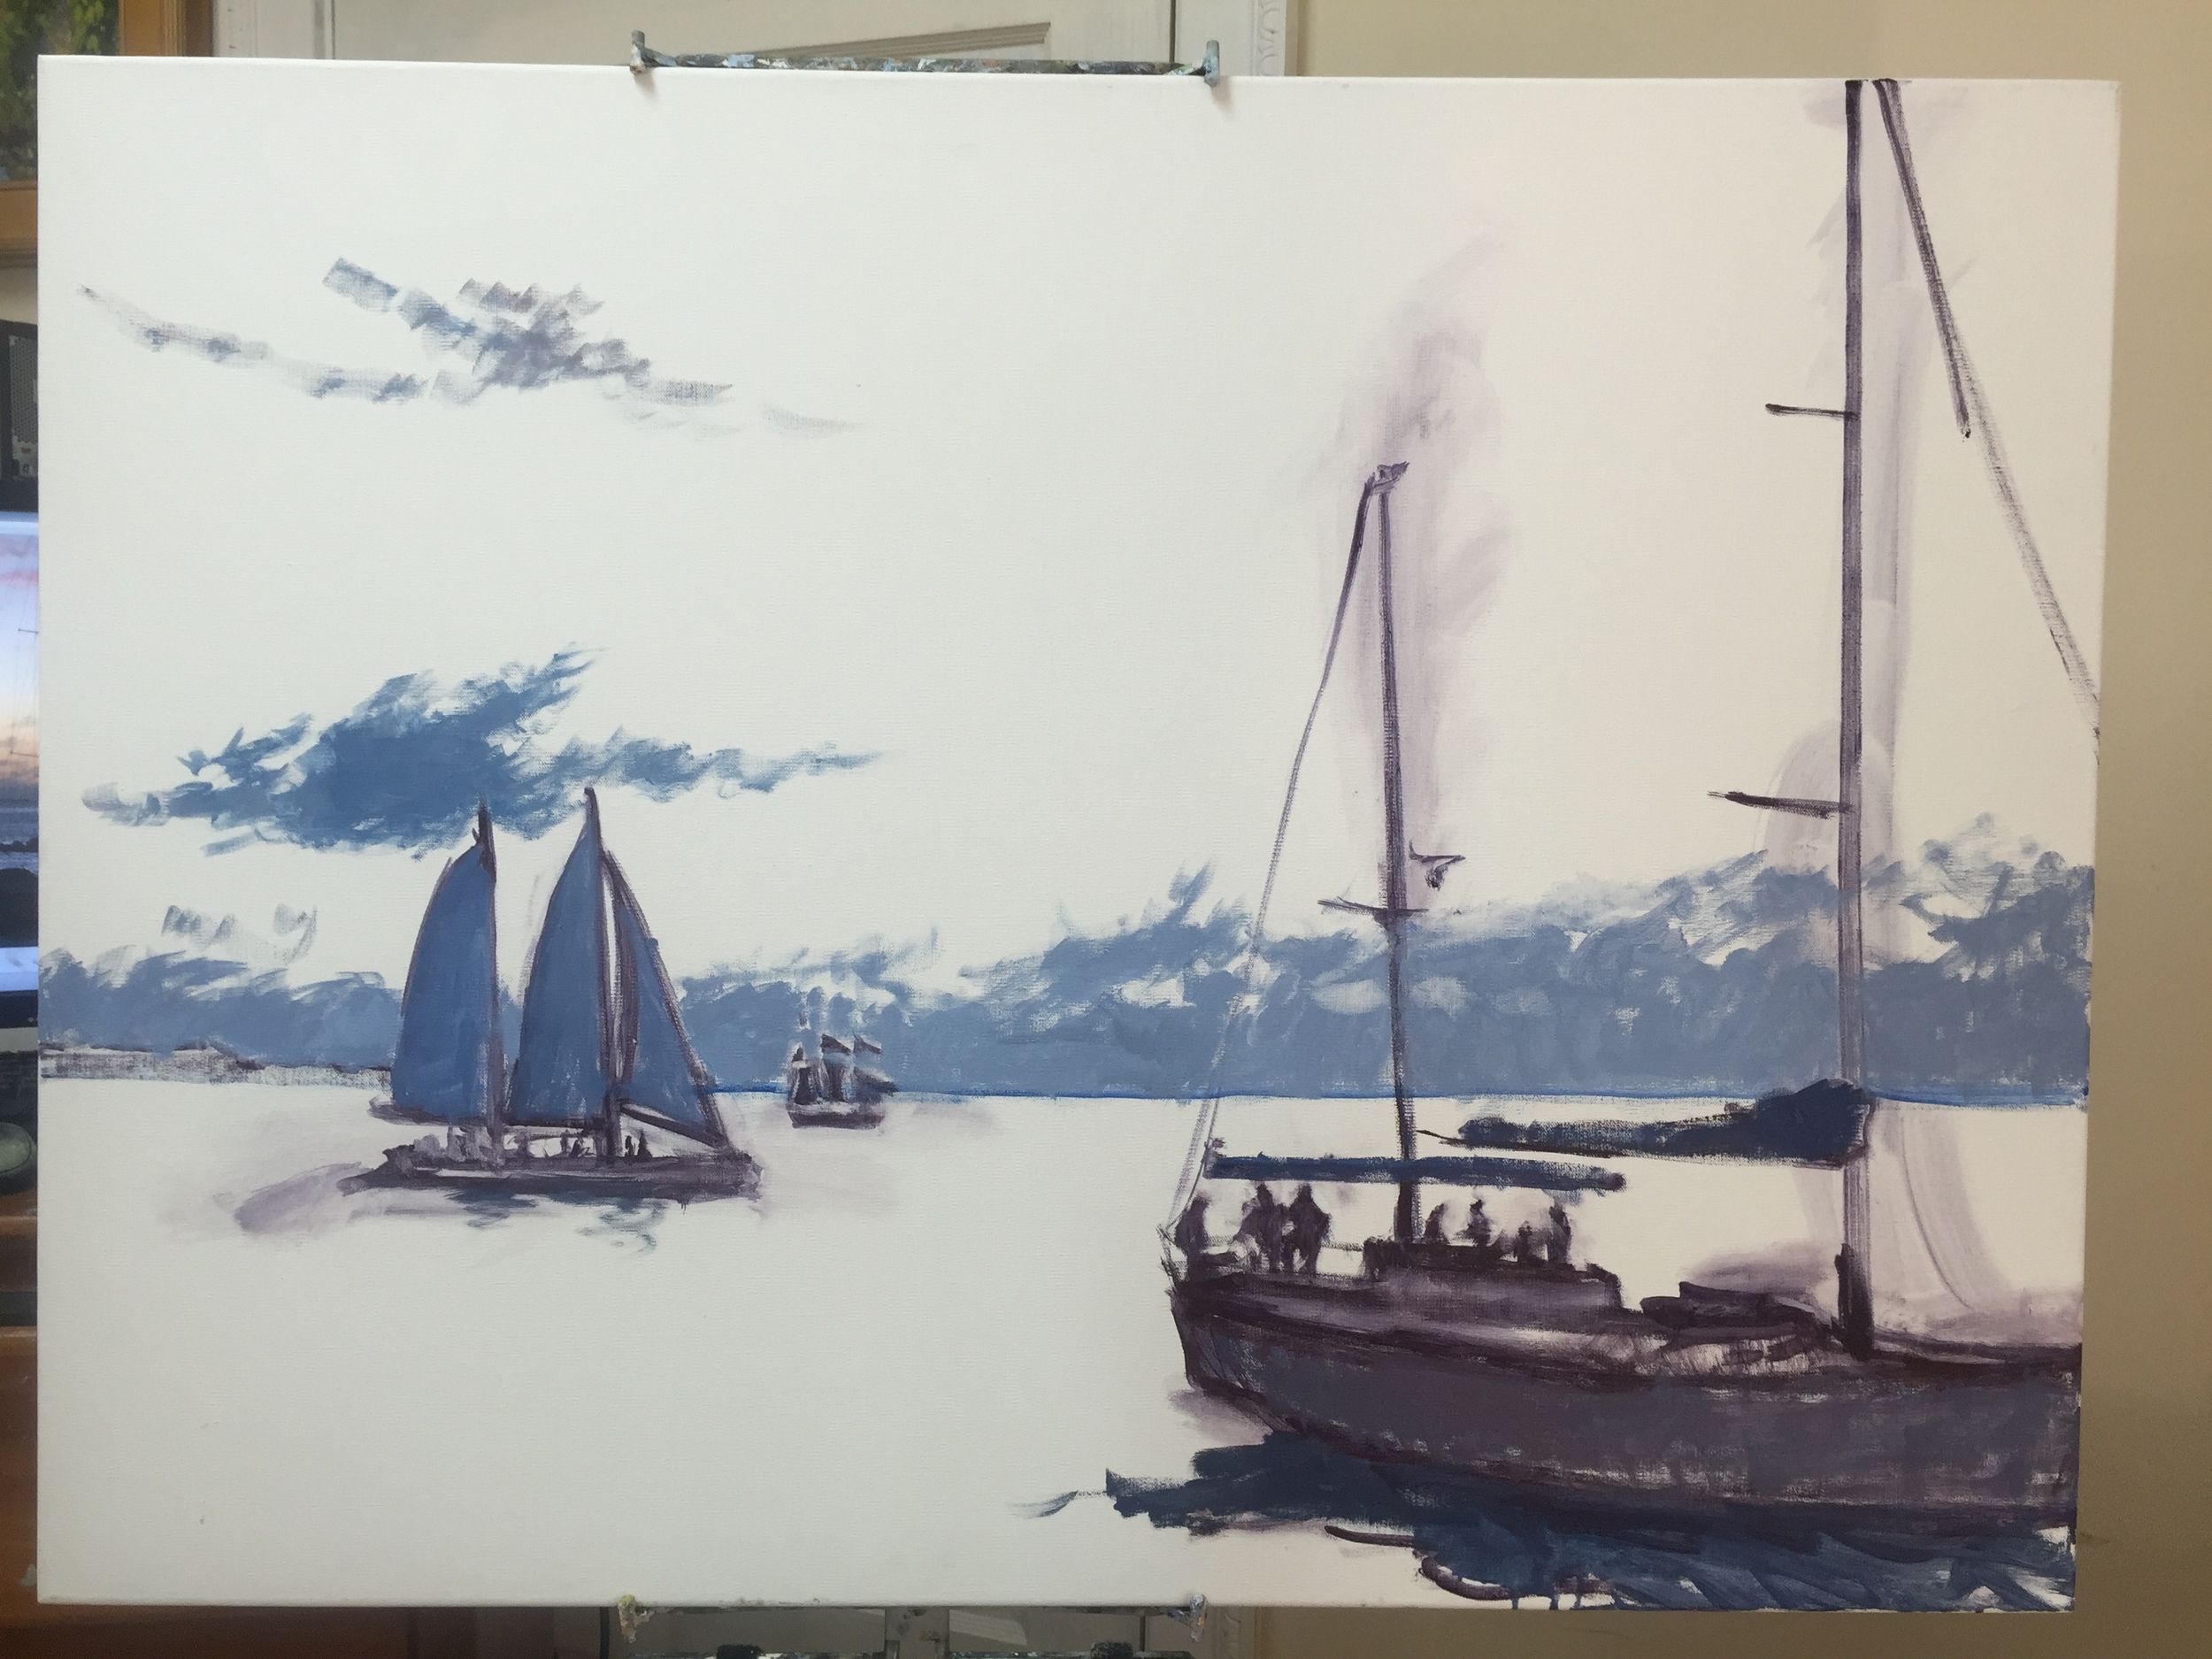
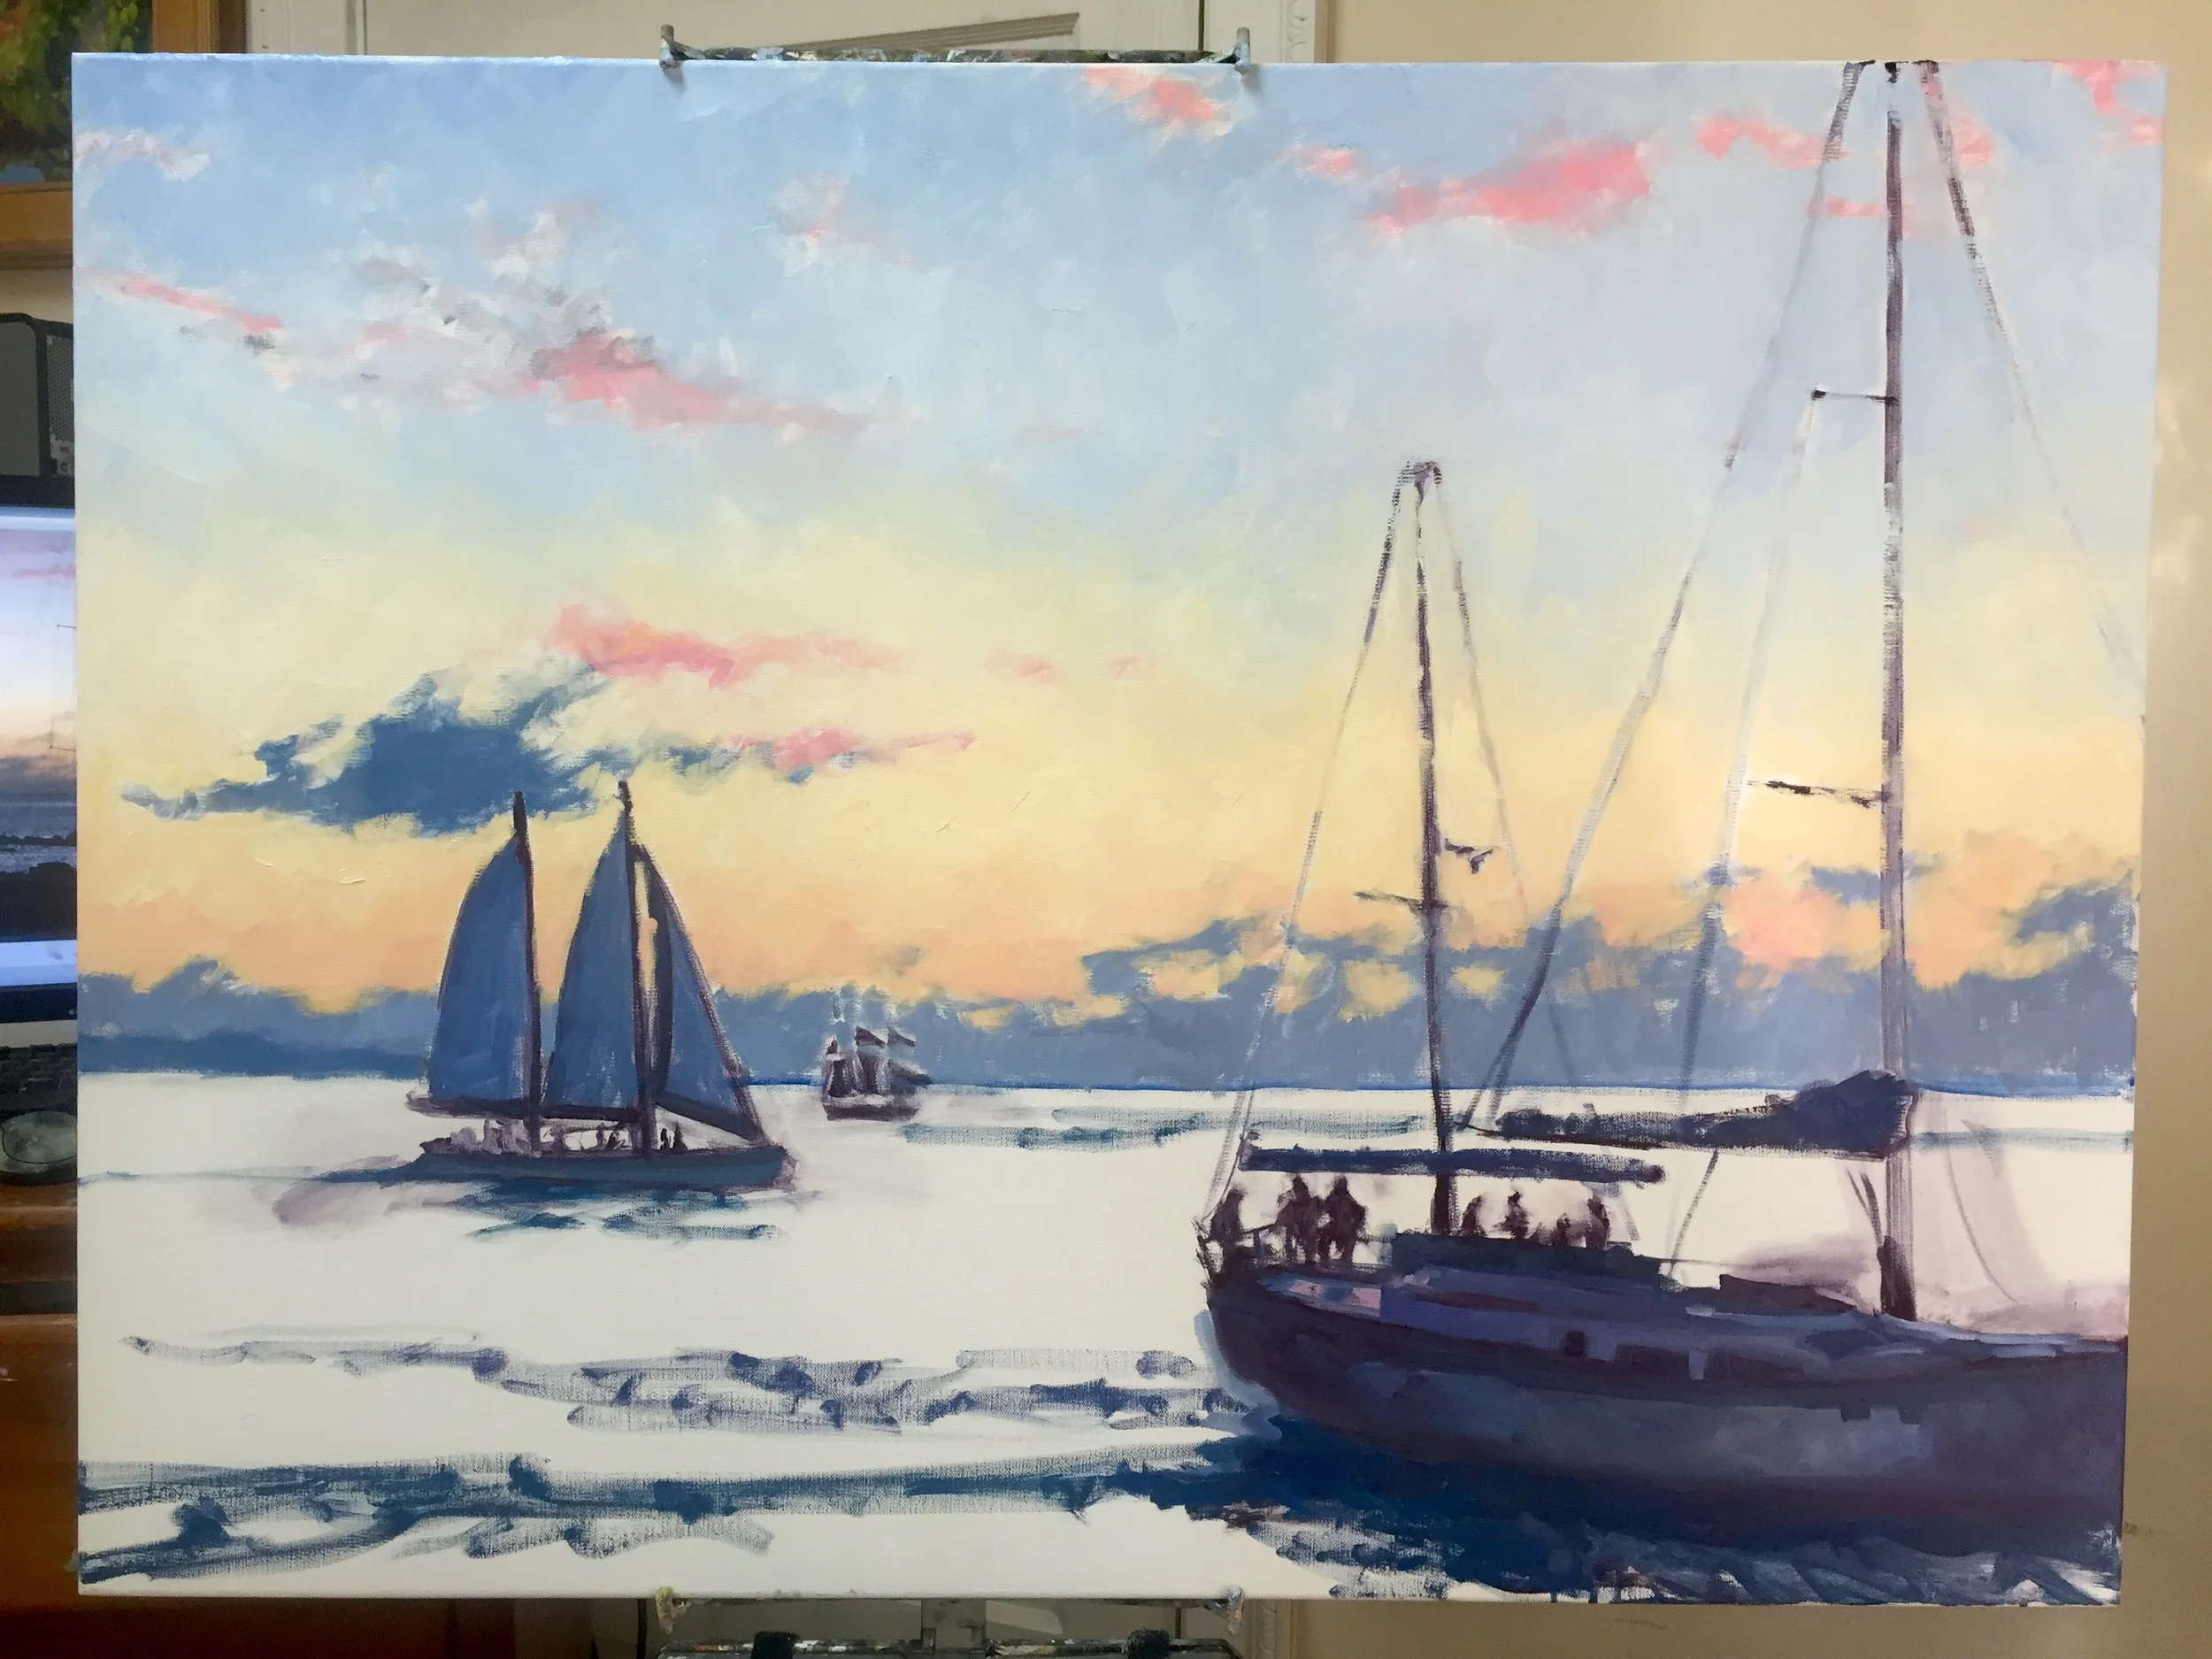
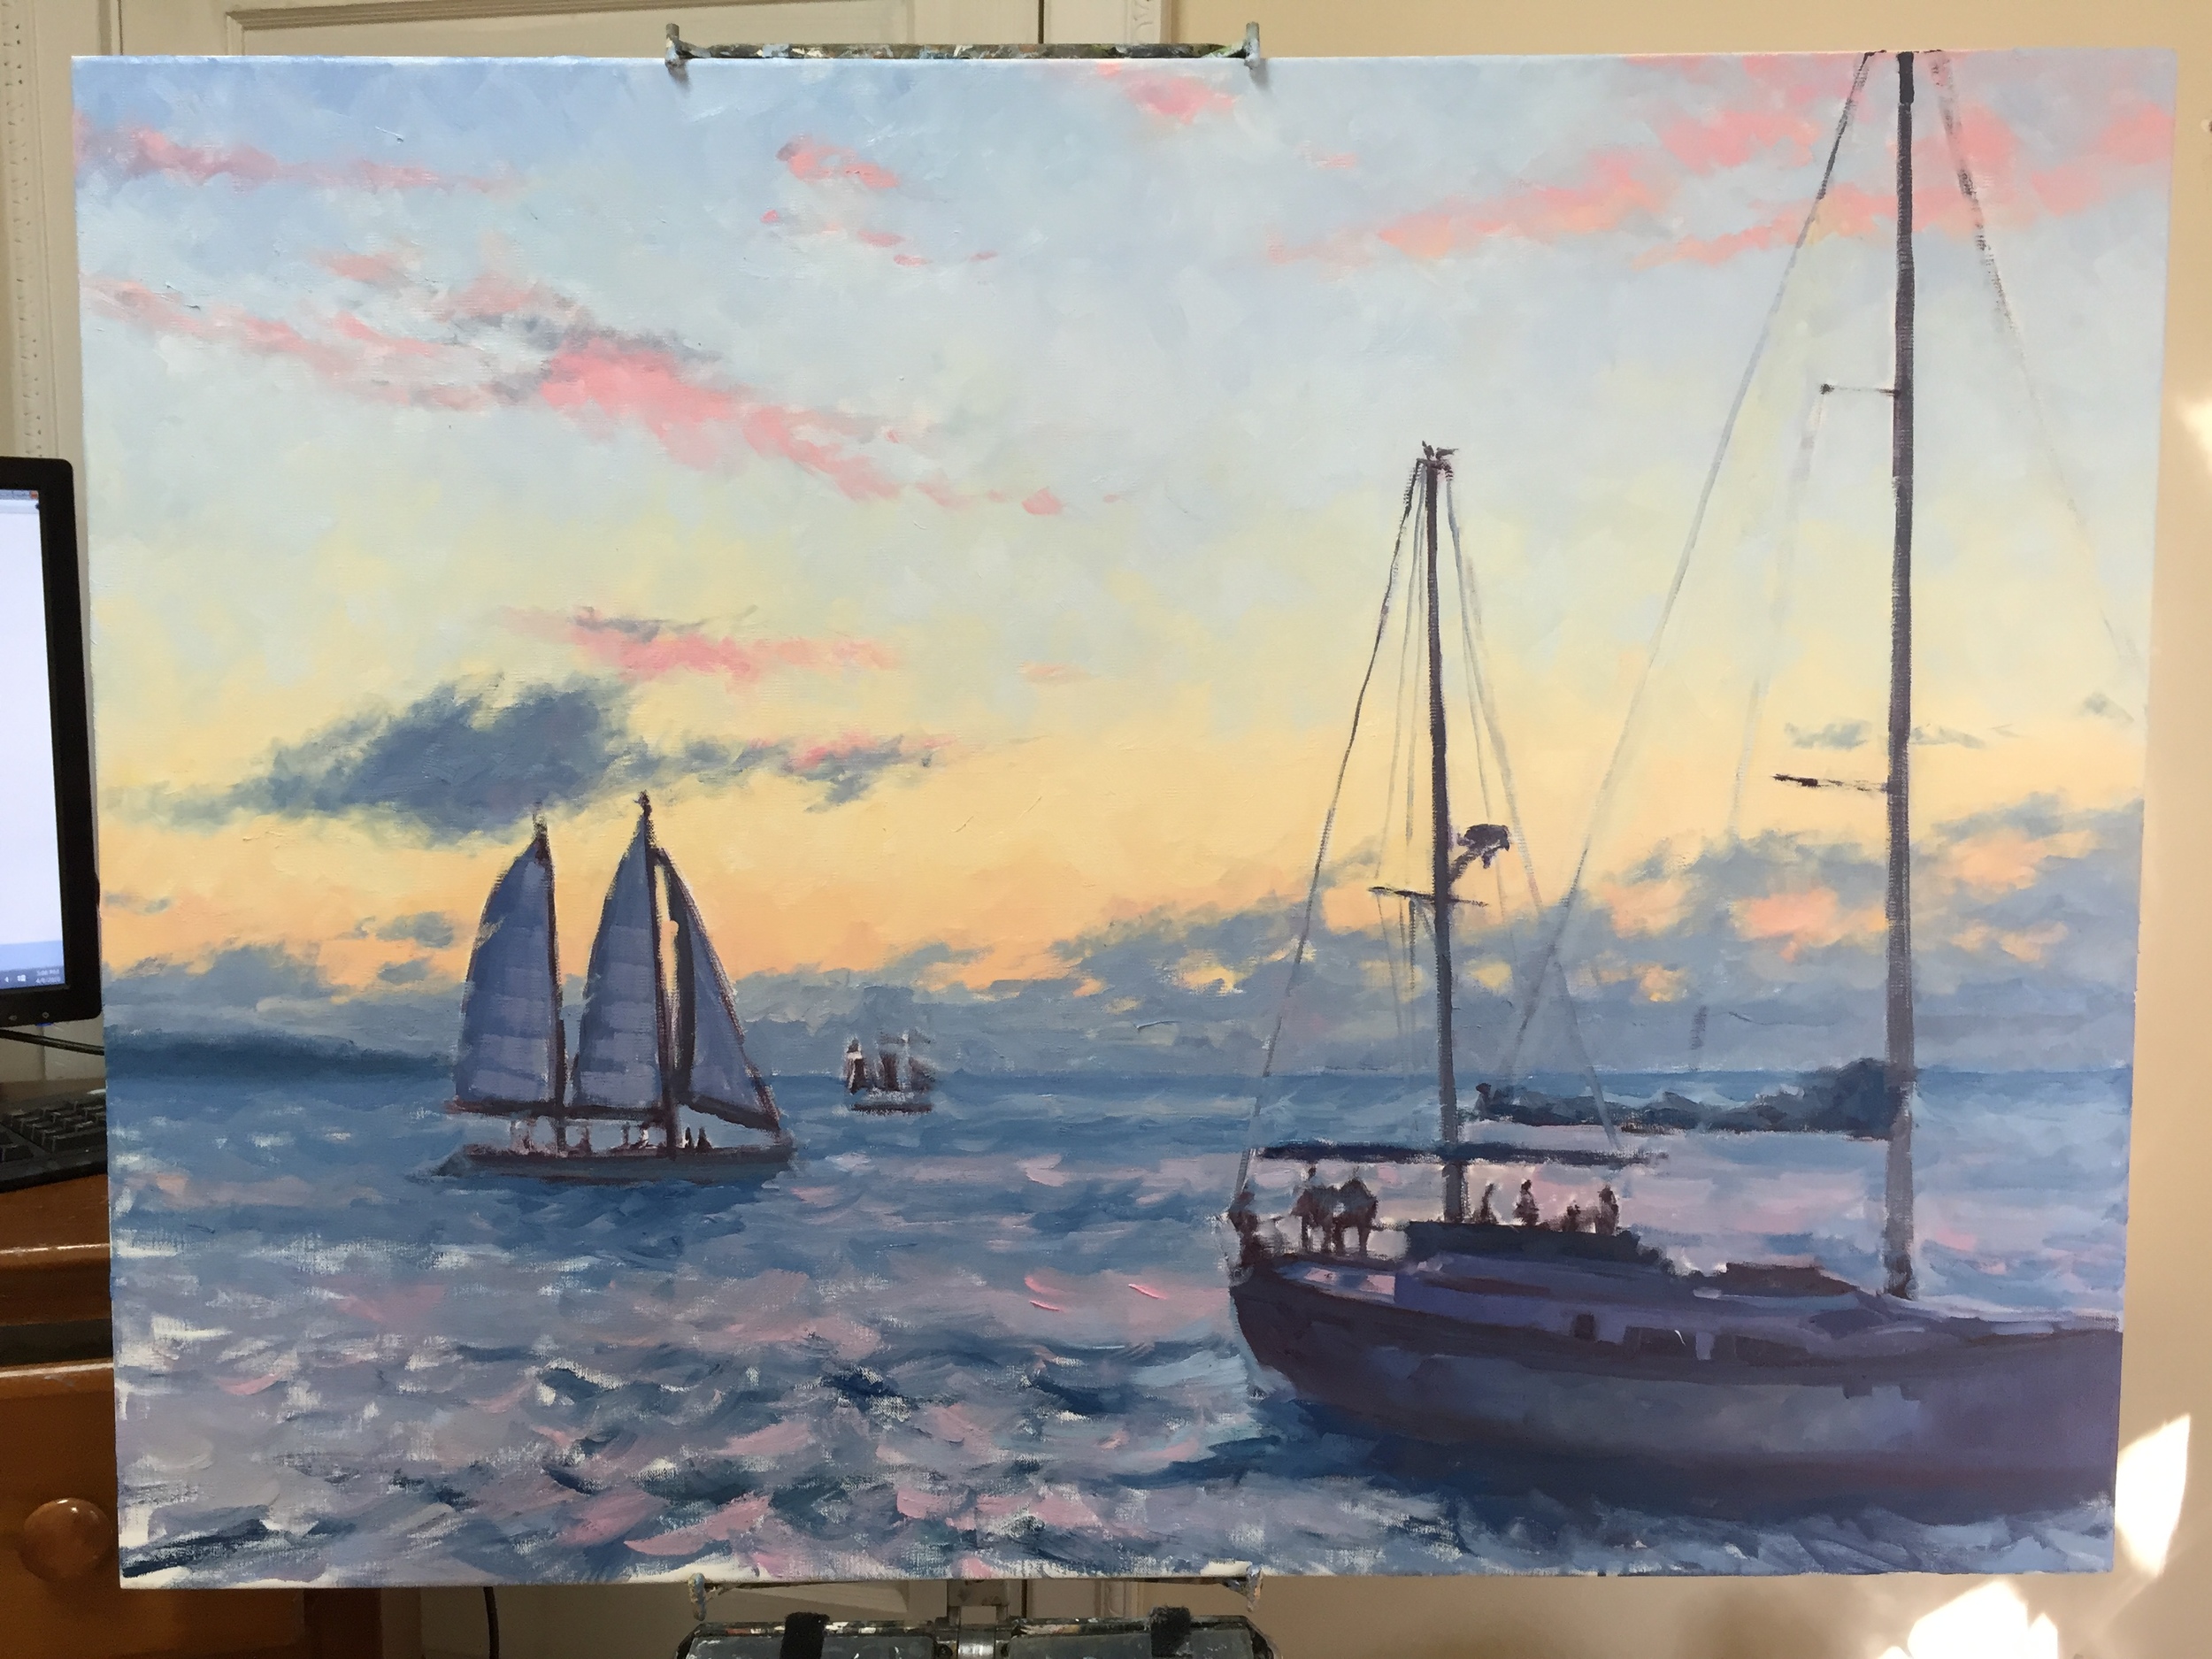
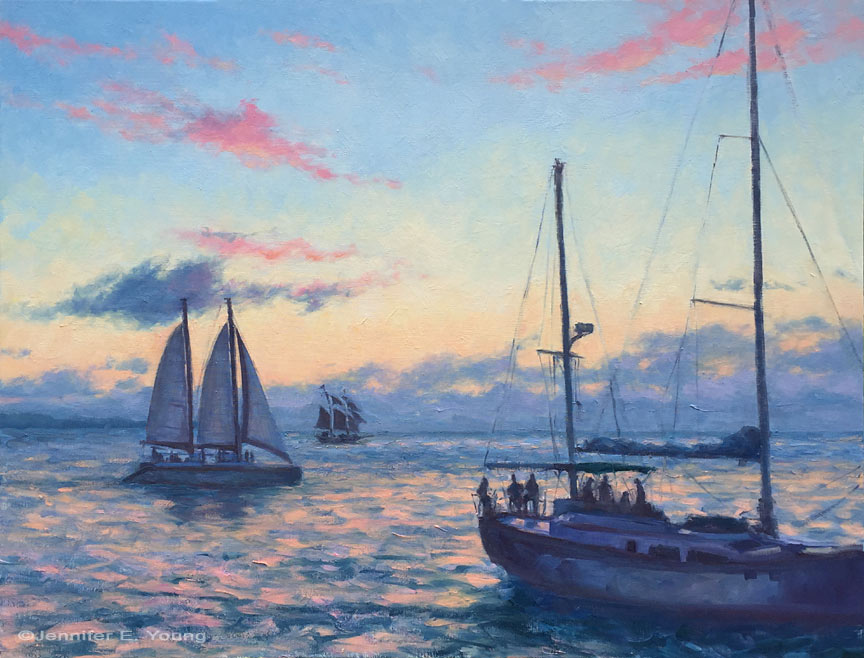
Sunset Sail

Ever since my last blog posting, we have had rain, rain, rain. Needless to say, it thwarted many of my open days where I would have otherwise painted outside. The up side is that I finished the large 30x40" sunset painting I had started a while back, the progress of which I present to you now: