Last Light on the Orchard

We are in mid-construction here trying to convert the garage to my new studio space, so I am staying close by and working in the studio, as time and interruptions permit. I am preparing for a June show at the Cabell Gallery in Lexington, Virginia as well, which is proving a challenge in my chaotic state. Nonetheless, I'm  having a bit of fun mining my photos from various plein air trips I have made to the mountains in last few years.

One most memorable trip was a beautiful long weekend trek I made solo to Crozet, Virginia. I stayed in a sweet little country cabin and explored the area with my paint kit. The orchards and wildflowers were blooming and I was in heaven. The plein air pieces I did during that trip have long since sold but through my reference photos and photos of the work I did there I developed this large studio piece:

"Last Light on the Orchard", Oil on linen, 24x36" ©Jennifer E Young

"Last Light on the Orchard", Oil on linen, 24x36" ©Jennifer E Young

A few years ago I had worked out a 30x40" painting of this same scene, but I really wanted to try this again now that my style and color sense has evolved. I rather prefer the 24x36" format to accentuate those long slivers of sunlight that are spilling across the mountains and the grass, righ before the sun takes its leave for the day.

Happy Thanksgiving!

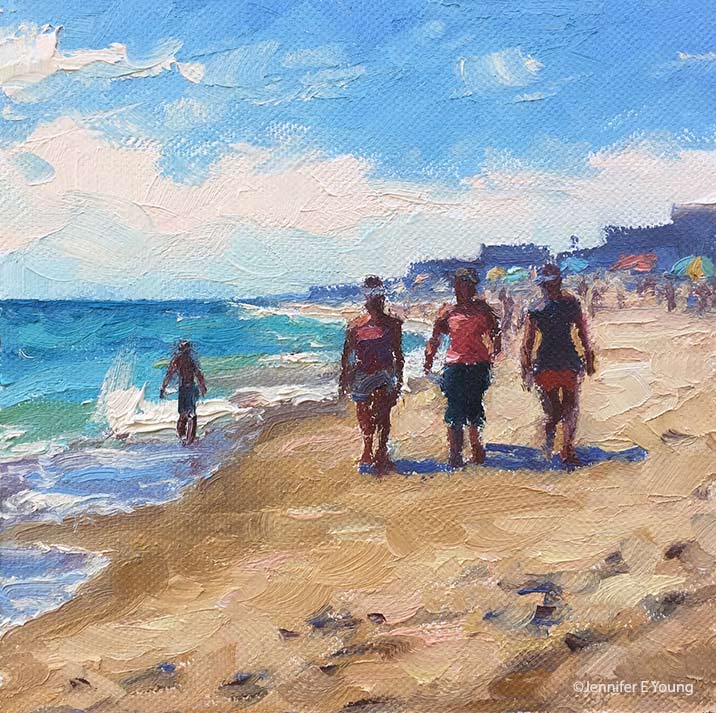
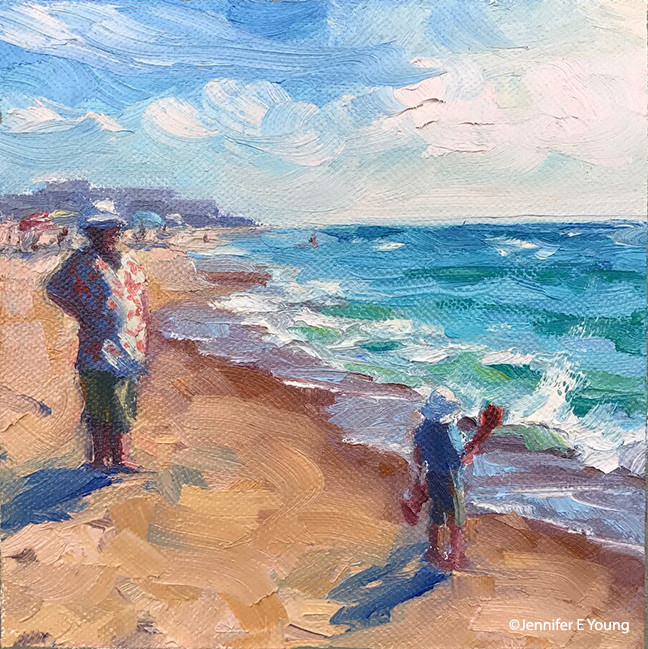
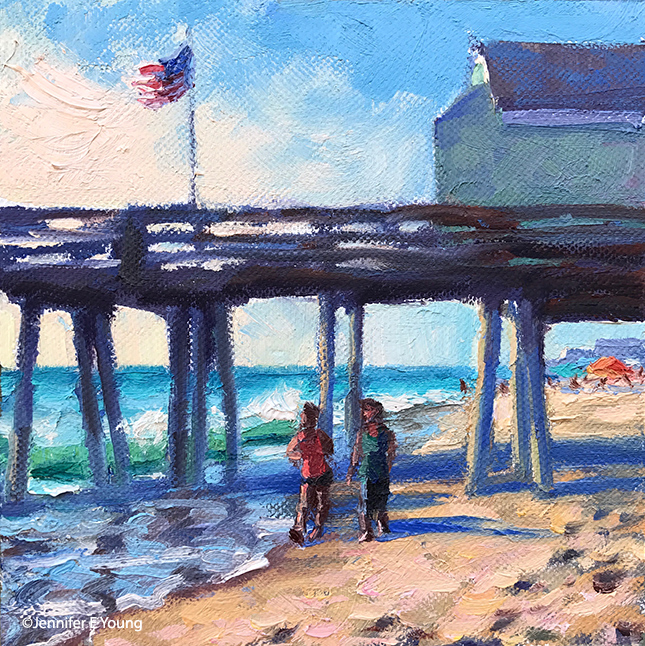
Happy Thanksgiving everyone! Before we head over the river and through the woods to commune with our family, I thought I share this little series of beach paintings I completed last week for the Annual Miniature Show Opening December 1st at Gallery Flux. Each image is just  6x6". While they are a little "off season" for us here in Virginia, the overarching theme that was at the forefront of my mind was one of family and friendship. So in that sense, they seem a good way to herald in the Thanksgiving holiday.

These are some crazy and tumultuous times we are experiencing right now in America, which makes our bonds and connections with each other all that much more important. Enjoy your time with loved ones today, in what ever way you observe Thanksgiving. I know I am incredibly thankful for my own personal relationships, which includes each of you who have connected with me through art. In friendship- Jennifer
 

Venetian market demo, continued

Today before I continue with my painting demo, I thought I would mention the colors I'm using on my palette. For many years I stuck with a fairly limited palette of about 5 or six colors (cad. yellow light, cadmium red, alizarin, ultramarine blue, pthalo green and white.) This was great for me as it really pushed me to learn how to mix color and not become reliant on pre-mixed colors from the tube. It also really helps lighten the load when I am packing my gear to take my studio outside and paint en plein air.

But these days in the studio, my time is more limited. I have a finite amount of hours each week to paint, blog, frame, ship, not to mention cook, eat, sleep, and care for my family. So I have allowed myself the luxury of an expanded palette to speed things along in certain areas. For instance, while I know how to mix secondary colors and some decent earth tones with a limited palette, things can move a bit faster if I have some premixed secondary colors (a.k.a. "convenience colors")  in my toolkit. So, for instance, red+yellow= orange., but cadmium orange is still a nice color to have both for it's purity and intensity and its convenience. In any case, whether I am using primaries or secondaries or pre-mixed earth colors, there is still plenty of color-mixing along the way, and  I don't ever use any color straight from the tube on my canvas.

Aside from the convenience, I am just enjoying playing with new colors. I've had less time to get out to doplein air painting, and I have missed it. So adding something new to experiment with in the studio keeps things fresh for me. On the palette I'm using right now I've introduced a few earth colors, plus some colors from Gamblin's radiant line. Aside from the colors listed with the asterisk *, I may not keep all of these colors out on my palette every time. But they have made an appearance in the studio often enough over the last few months that they are worth mentioning. All of these colors are Gamblin unless otherwise noted:

  • *Titanium white (Gamblin or Winsor Newton)
  • *Cadmium Yellow Light
  • Cadmium Yellow Deep
  • Indian Yellow (Winsor Newton)
  • *Cadmium Orange Deep
  • *Napthol Red
  • Radiant Red
  • *Quinacridone Violet
  • *Ultramarine Blue
  • Severes Blue-sometimes (Rembrandt)
  • *Radiant Turquoise
  • *Pthalo Green
  • Permanent Green Light
  • *Payne's Gray
  • *Brown Pink
  • Gold Ochre (Rembrandt)

 Now that I've gotten that bit of housekeeping out of the way, let's get back to painting! I spent my last post addressing the "shadow family" in this scene. In this picture you can see that much of the busy market scene is now at least suggested. But light is needed to delineate the forms and bring the scene alive.

venetianmarket_wip4_jenniferyoung

These images are a bit dark as I did not take the time to color correct the in-progress shots. But hopefully you can see that my approach has been to just focus on the general shapes of things without getting too bogged down in details. There are basically three large shapes of light spilling over this painting: the sky, the pavers, and the white awning, with lesser highlights on the figures.

Here is the final stage. I have kept things fairly loose because I wanted to keep the focus on the foreground figure, while still maintaining unity throughout the painting. Notice the difference in the color of the final piece below, taken under better lighting conditions to show the true nature of the colors in the painting.

"Il Mercato Veneziano", Oil on linen, 14x11" ©Jennifer E Young

"Il Mercato Veneziano", Oil on linen, 14x11" ©Jennifer E Young

Thanks for following along on my little painting journey to Venice! This piece is heading to City Art Gallery in Greenville, NC for their 30th Anniversary Celebration September 22nd. 30 years! Wow! Come join us for the party and see this painting (and yours truly)  in person! :-) 

The making of a commission

It's hard to believe summer is almost over. The move of my home and business, along with family matters, tended to completely monopolize my spring and summer, and yet there is still so much to do.   While we are slowly settling into the house, it will be some time before I have a studio. So I have "made do" with either painting outside in the blazing summer heat, or setting up a temporary studio with drop cloths in my poorly lit living room. For those reasons, my painting production has been down and it's been driving me a little crazy. Nevertheless, opportunity waits for no one, and commissions are a special kind of opportunity. Time to pull out the drop cloths and shop lights again! :-)  I have been painting for 20 years, and in that time, I've had a variety of commissions. Some are more "challenging", and some are pure delight. Of course, the latter are more pleasurable, but all commissions have been, to me, opportunities for growth as an artist.

My latest commission, in spite of my less than ideal work environment,  fell distinctly in the realm of the delightful. I met the client during a painting demonstration at the Little Gallery where my work was being featured in June. He happened to love one of my paintings in that show, called "The Potted Garden, Pienza":

"The Potted Garden", Oil on canvas, 12x12" ©Jennifer E Young

"The Potted Garden", Oil on canvas, 12x12" ©Jennifer E Young

The only issue was that the format (square) wasn't quite right. He was looking for a slightly larger, more vertical painting, and a companion piece of the same size to complement it in an adjacent spot.

I loved this little scene and I was happy to explore it again with a different format. So my first task was to convert my square composition to a vertical piece. Luckily, the architectural subject matter leant itself to the task naturally, and I was able to use Photoshop to render a "sketch" for a proposal in much faster time than I would have been able to do free-hand:

italianvillagemockup_jenniferyoung

As you can see, I didn't labor over rendering the upper portion. The purpose was just to continue it upward to demonstrate how it would look. (Photoshop is a very expensive program, but nothing beats it for working out compositional options for paintings!)

In all honesty, because the location of the focal point was in the right position for both the original 12x12"  and the commissioned 16x12" format,  I didn't have to do much to the composition of the original painting beyond extending it. That's not always the case, believe me, but this time things worked out really well. But because I was losing a window on the upper left, I did suggest that I replace the two flower pots under the window for a larger, single hanging basket, as this would give this area more unity.

Once I received the client's approval for my proposal of the first painting, I set to work finding a second composition that I would create as a companion piece. I'll cover that in the next installment. Stay tuned!

Happy Thanksgiving! Plus, a little studio tour!

On this eve before Thanksgiving, I feel extremely grateful for the blessings of both my personal and professional life.  To my collectors, past students, and readers of my blog and newsletters, I give my heartfelt thanks. Knowing that people have taken such an interest in my art (and my meandering thoughts about it) does my heart more good than I can adequately express! Happy Thanksgiving to you all! One of the many other things I've been extremely grateful for professionally these past few years, is my studio. Since I just cleaned it up, I thought it might be nice to show some pictures of how it looks today (now that I have had about 5 years to break it in.)

The last time I posted pictures of my studio, I had only barely moved in. But, while it may have  a little bit more clutter now than it did initially, it is still a "clean, well-lighted space".  It continues to be a place of inspiration for me,  and now for my little daughter as well. And since I've become a mom, I have thanked my lucky stars these last few years that I have my studio within a stone's throw of my back door. Sometimes the only time I have to paint is in the wee hours, so proximity has been key.

Any way, without further ado, on with the tour!

This first shot is more or less the view straight on as I walk in my side door (the main entry door for me as it leads to the house.) Following this path leads me straight back to my painting space, which sits across from that big brown easy chair and the French doors beyond (just out of view to the right). In that far back corner are storage bins (built by the D.H.) for frames and canvas.

Jennifer Young Studio & Gallery

From this spot, looking slightly to the left, you will see the framing table and flat files. That table from Ikea, as well the room divider, hold all of my framing tools and shipping supplies, small canvas and panels, etc. I got the flat files for a song at a thrift store. Luckily it just so happened they fit under the table nearly perfectly.

jystudio_framingtable

Directly across from the framing table is my computer desk. I also have more storage for frames, shipping tubes, bubble wrap, etc., in the loft area overhead. Nothing too heavy goes up there, as the only access is by that very tall loft ladder!

Art studio of Jennifer E. Young

Here's another shot of the loft, as well as the "side door" that I use to enter. To the left of this area I have carved out a reading nook. This area has kind of become a little annex for my daughter's arts and crafts, but I still can use it for guest seating when I need to.

Art studio of Jennifer E. Young
art studio of Jennifer E. Young

Moving past the room divider now, we come to my painting area. Being my primary workspace, this side of the studio is a little more about form following function. ;-) The sink sits in the far left corner. The "mini-split" we installed for heating and cooling sits on the wall nearby. It  keeps things nice and comfy. I have another one over the windows of my reading nook. In hindsight I really think I could have gotten away with just one of these units in this space. They are very efficient!

art studio of Jennifer E. Young

So there you have it! The nickel tour. Again, Happy Thanksgiving, everyone. I'll be out of pocket for the holiday, but back to posting again by this weekend  Eat well and safe travels!